JIRA Integration
Here you will find the necessary steps to integrate JIRA into your AnswerHub community and interact with JIRA as a community user.
As an Administrator
Steps 1 - 12 explain how to integrate JIRA into your community.
1. Log in to AnswerHub
First, you will need to log in to your instance of AnswerHub.
![AH_Login_Filled[1].png 1888](https://files.readme.io/2ef01ad-AH_Login_Filled1.png)
2. Navigate to the Administration Dashboard
Navigate to your Avatar and select Administration in the drop-down.
3. Setup to View "Manage Plugins" Page
To view the Manage Plugins page, you need to make sure you are part of the Network Administrators group, otherwise, you will get a permissions error showing “Access Denied.” A Super User who grants permissions and selects groups for users can approach this in three ways: "Manage Your Site" box from the center Dashboard, "Manage: Groups" from the tree, "Manage: Users" from the tree.
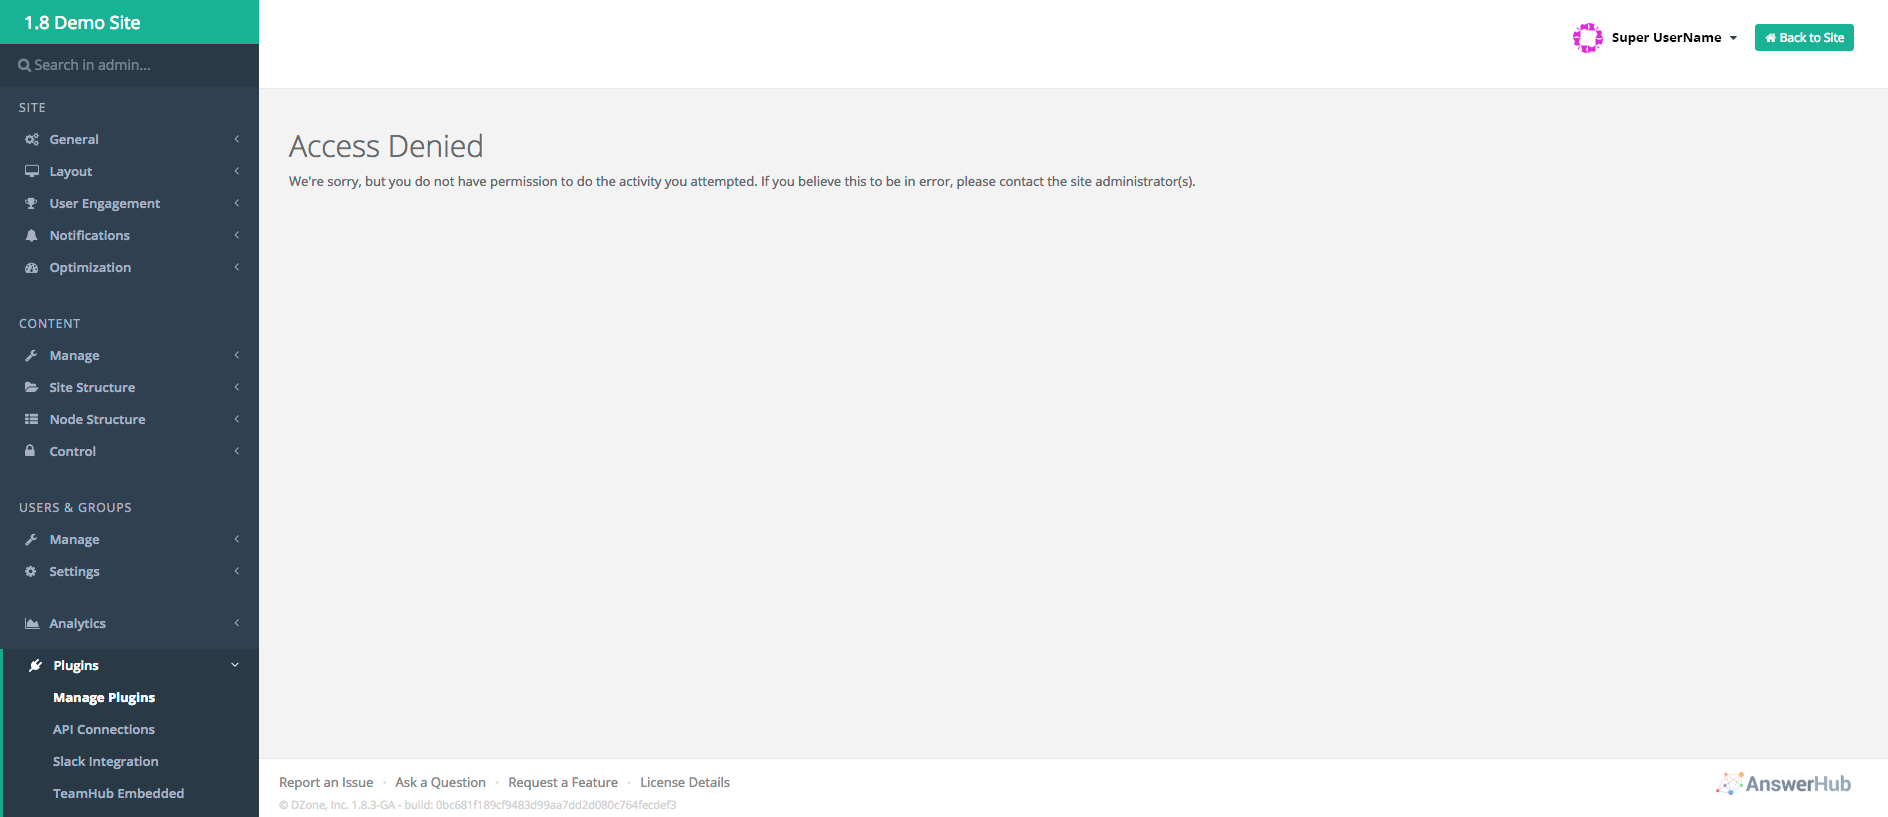
If you see this screen, you are not in the Network Administrators group.
First Approach (Pick "Group" or "Users" from the center Dashboard box displaying "Manage Your Site:[Users, Groups, or Spaces]):
a. Navigate to the “Manage Your Site” box on the dashboard (highlighted in a red box in the screenshot below).
b. Select either Groups or Users. From this step, you will go the second step (step b) in the second or third approach, based on whether you chose to Groups or Users.
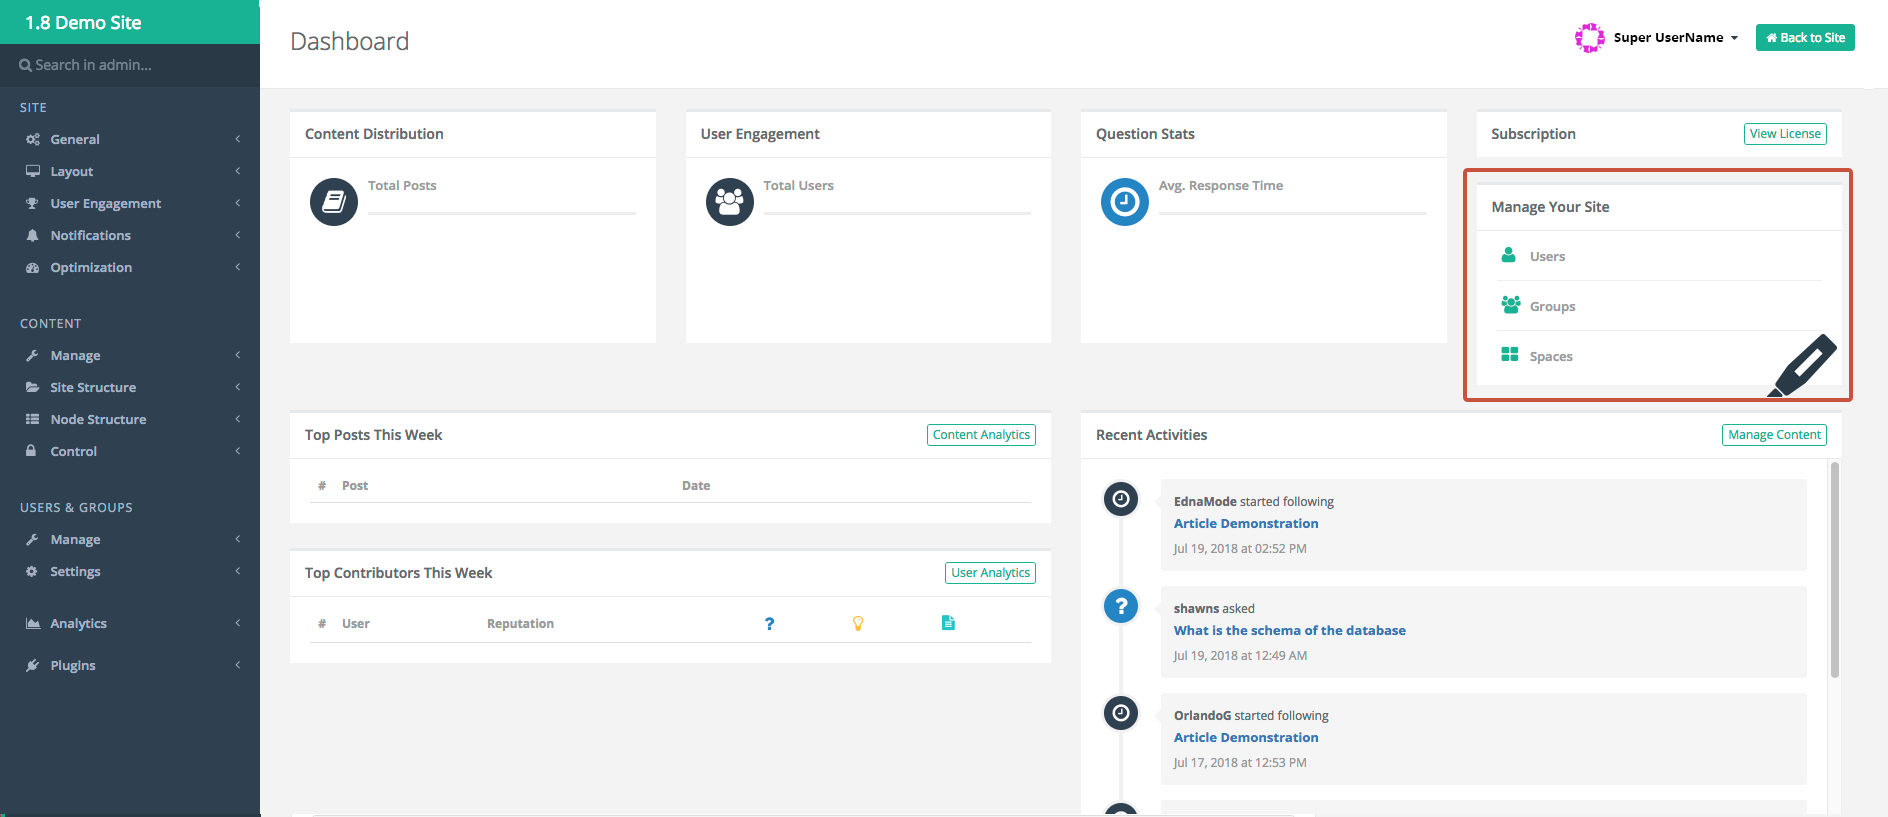
The first approach to select Users or Groups from the Manage Your Site box.
Second Approach ("Manage: Groups" from the tree):
a. Navigate to Users & Groups > Manage > Groups in the tree, and click th Network Administrators link.
b. Check the list for your name.
c. If you are not on the list, add a new member by typing the name in the Find user field next to "Add a New Member."
d. Select the member name and it should appear in the list of members.
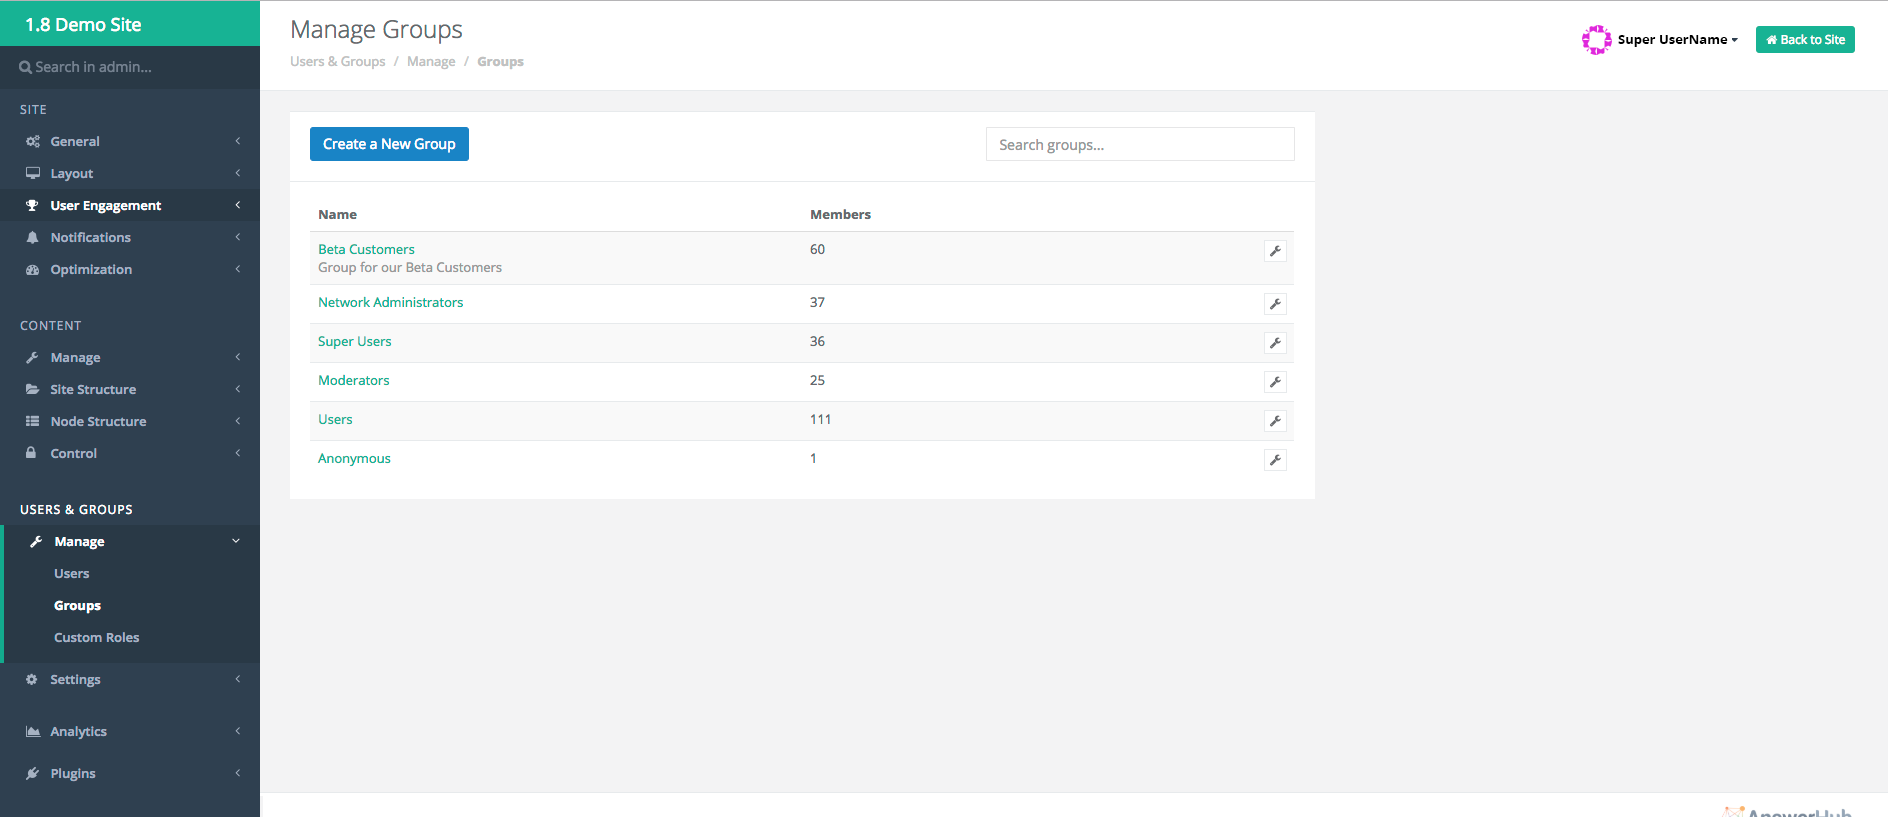
The second approach to manage by Groups.
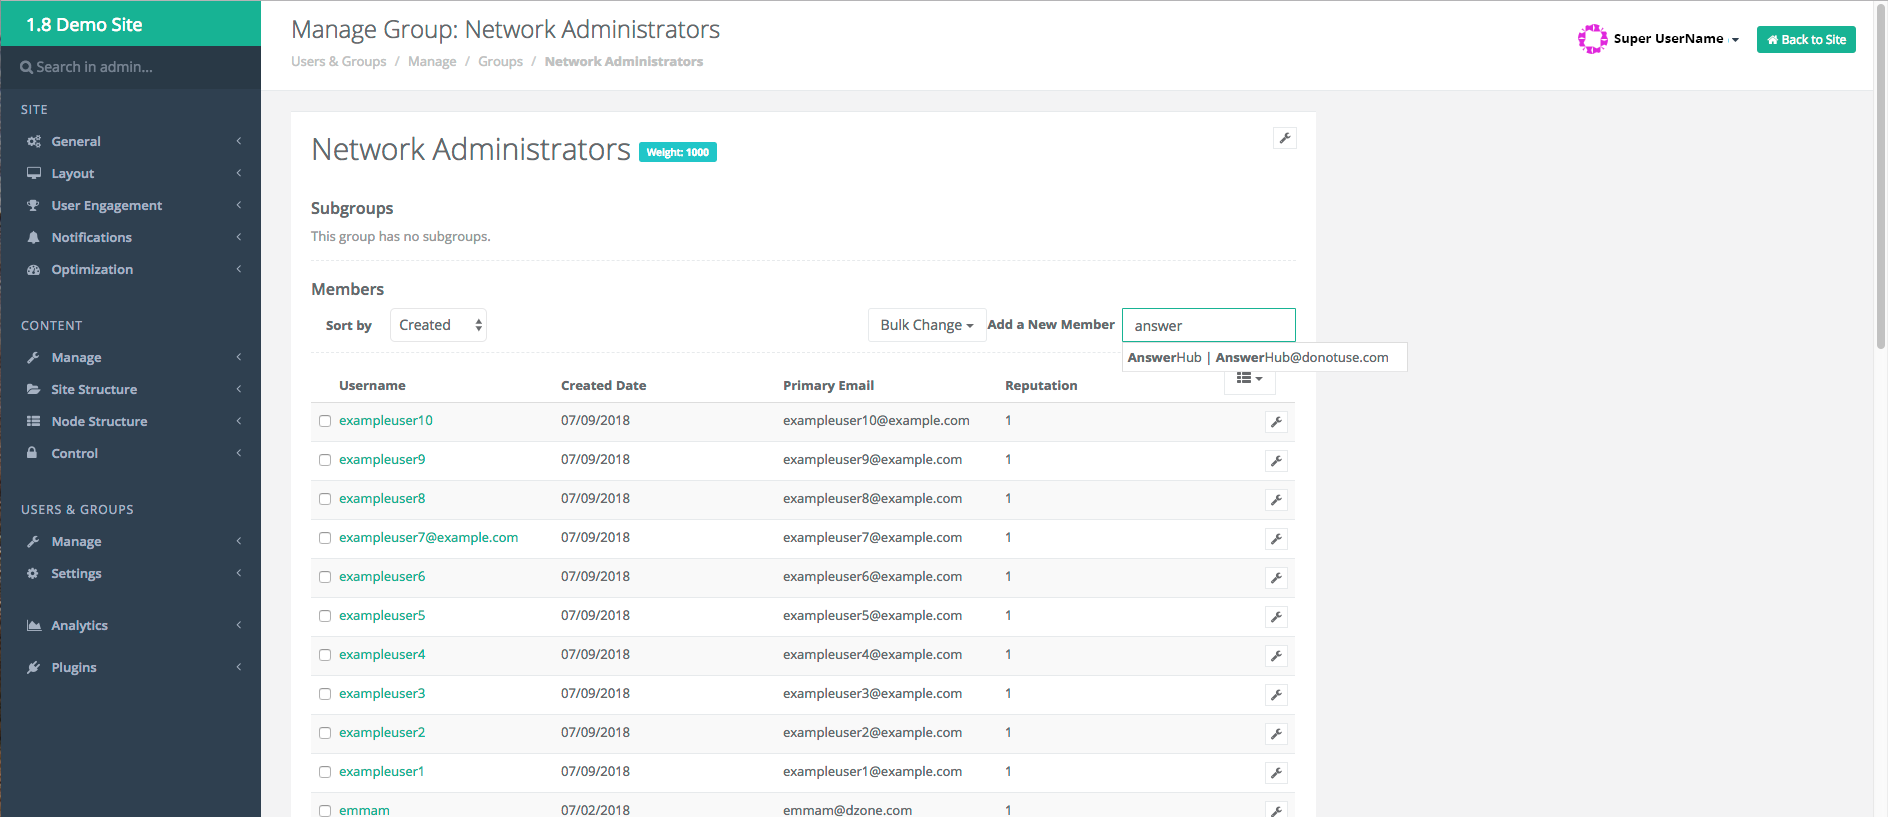
Typing in a username to search through the Network Administrators group.
Third Approach ("Manage: Users" from the tree):
a. Navigate to Users & Groups > Manage > Users in the tree.
b. Select the user to see which groups they are a part of, or search for and then select in the drop-down.
c. Click on the Group Memberships tab once you’re looking at the user.
d. You can add a new group for the user to become a part of.
e. Type Network Administrators in the Add to a New Group field and then press Enter to make the change.
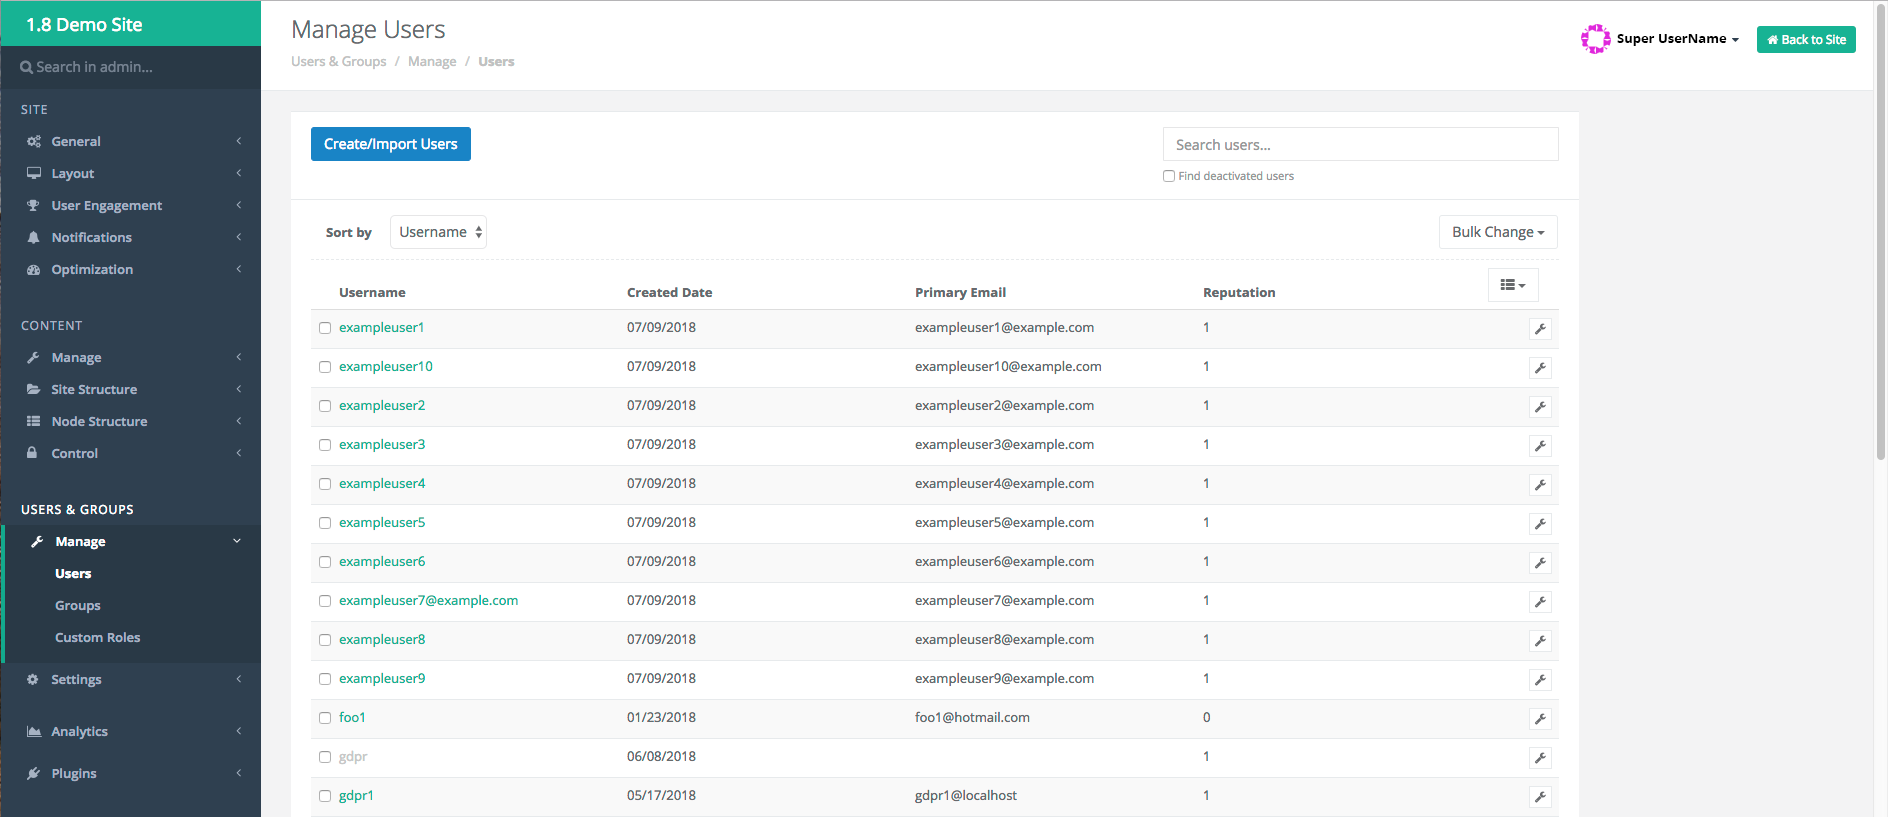
The third approach to manage by Users; select a user by scrolling through the names or by searching for a user.
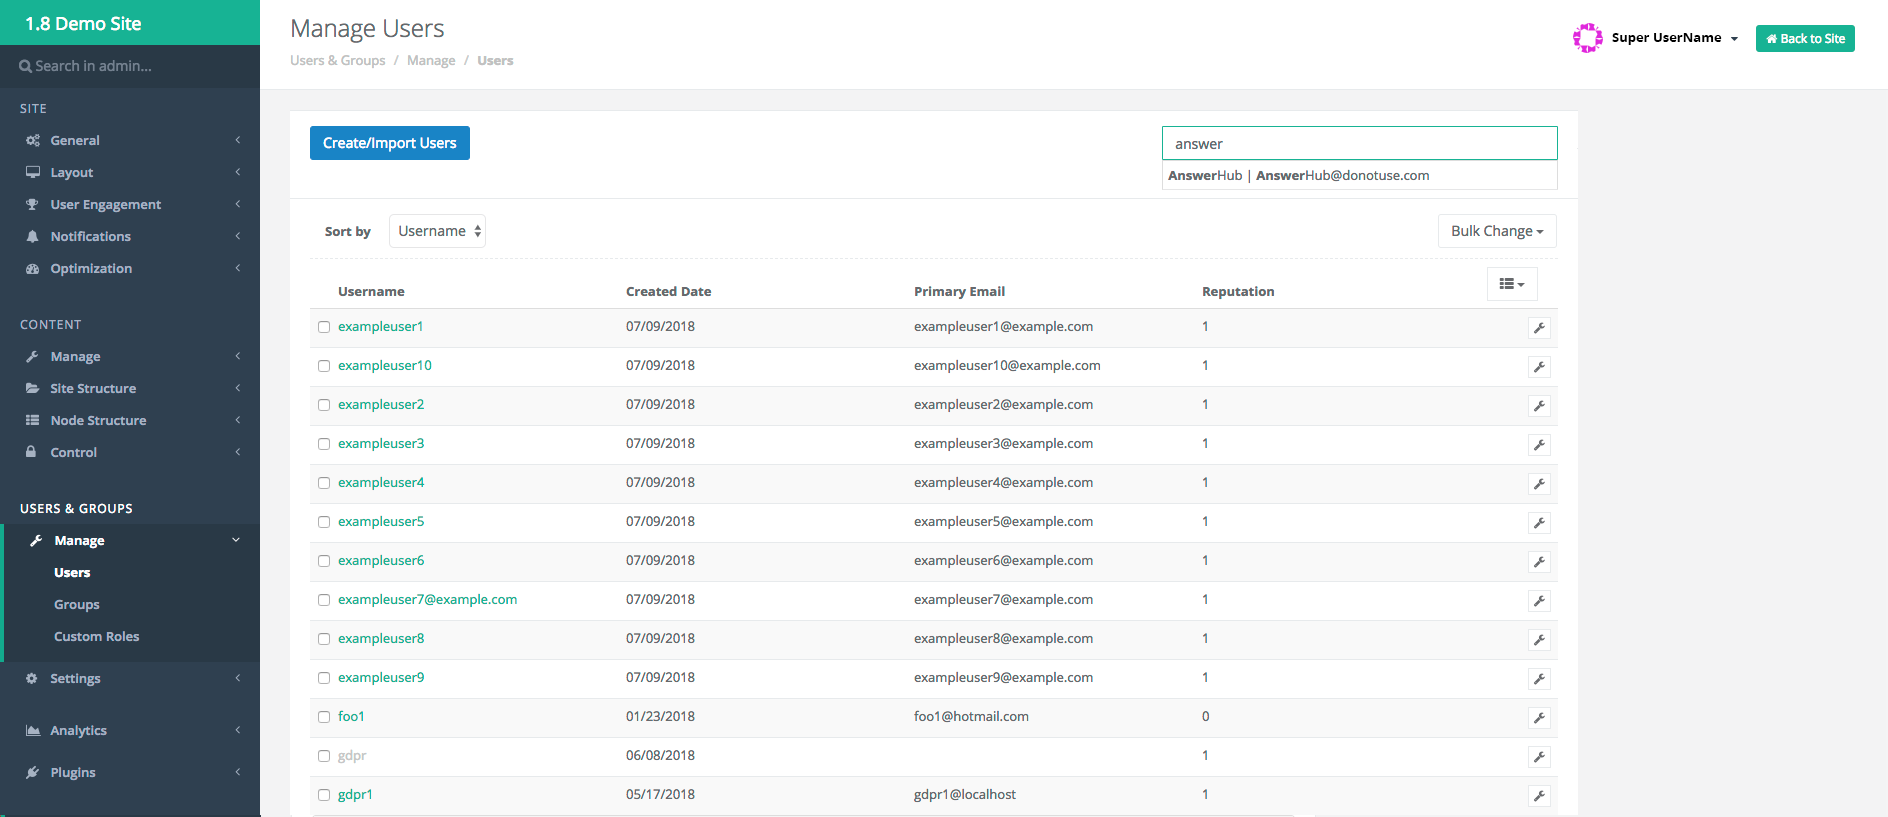
Searching for a user on the Manage Users page.
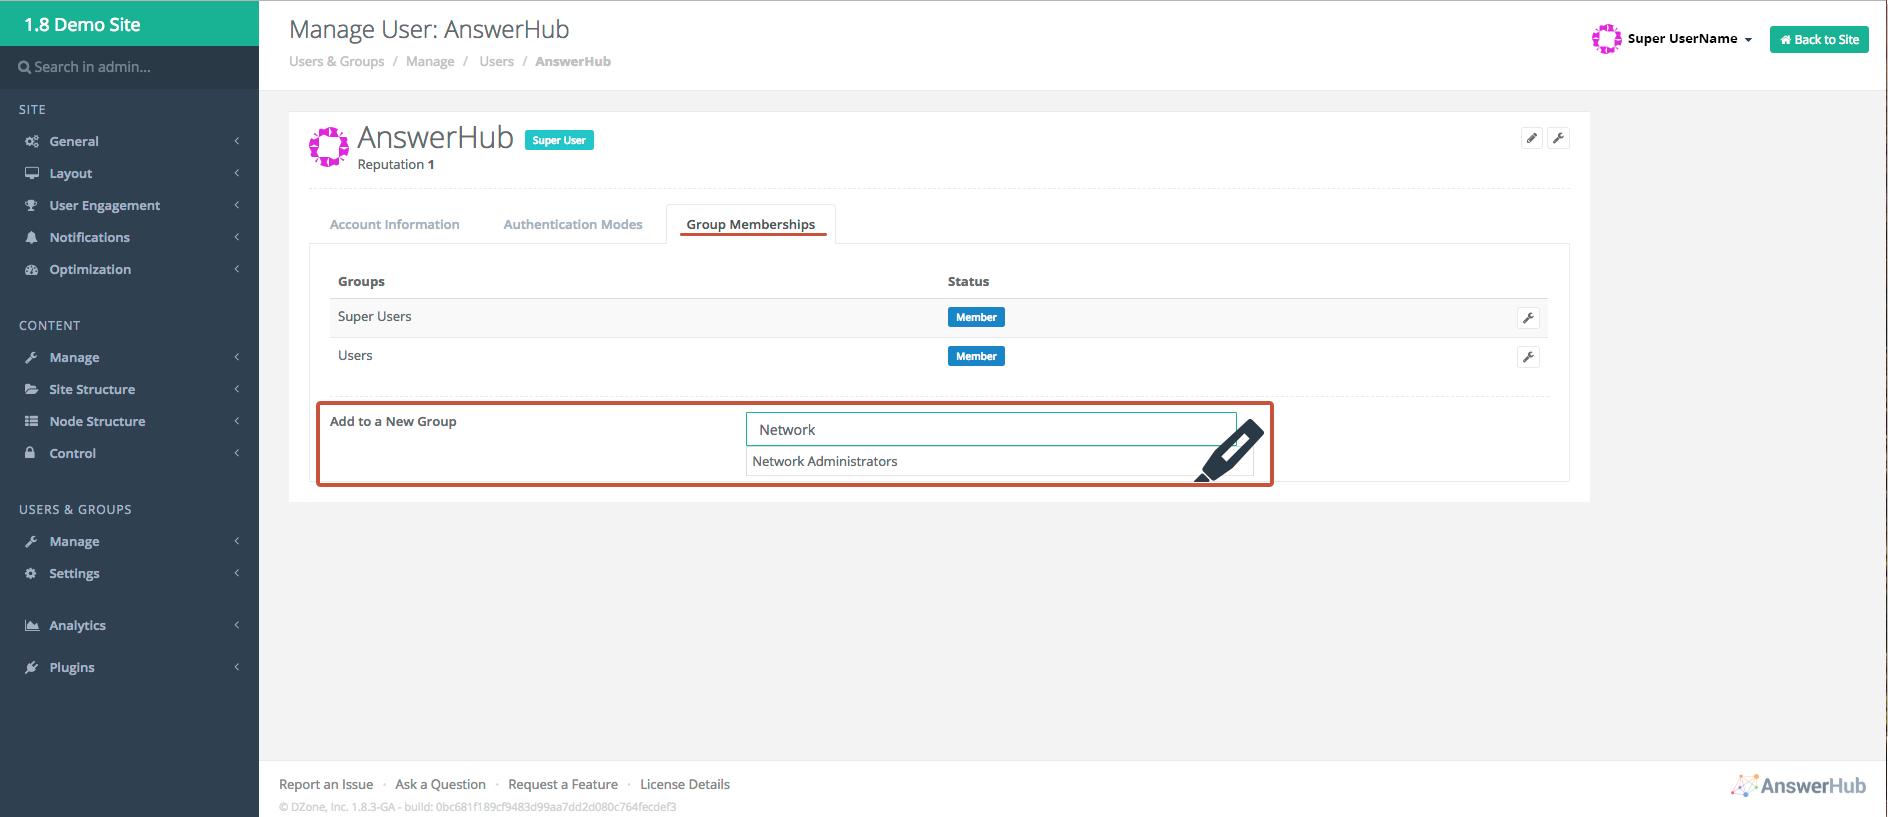
Adding a specific user to the Network Administrators group.
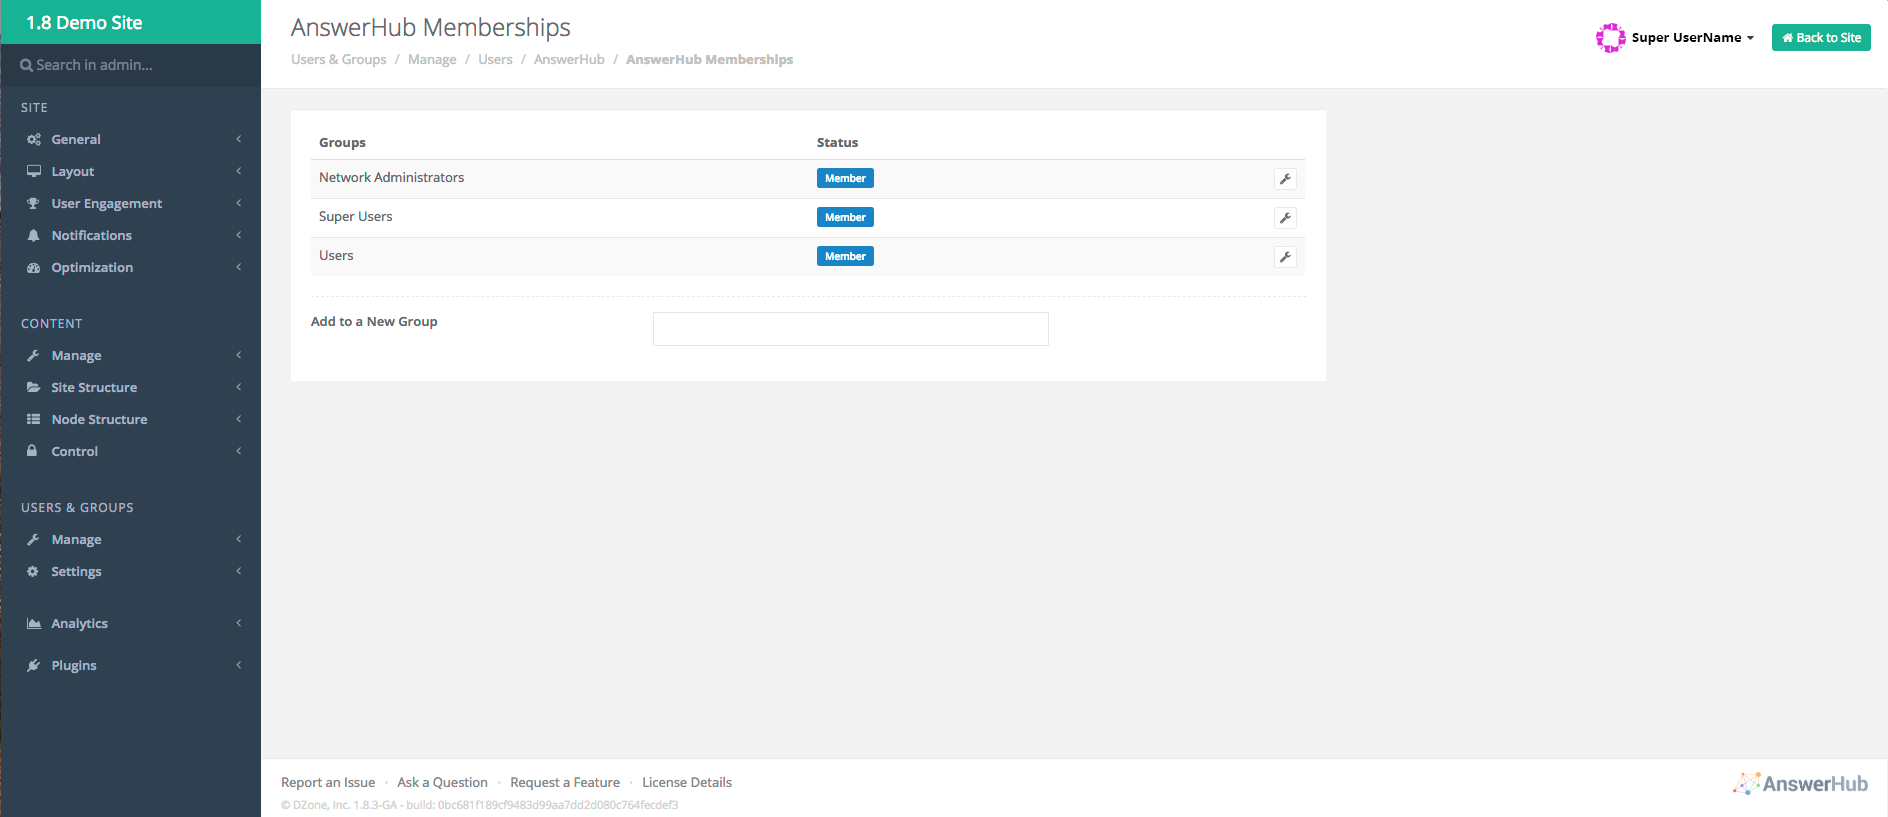
Successful addition of the user to the Network Administrators group.
4. Navigate to "Disabled Plugins" in the Manage Plugins Page
a. Navigate to Plugins > Manage Plugins, listed below the Users & Groups category in the left-hand side tree.
If you get the “Access Denied” message, you are not part of the "Network Administration Group," which is required to view the Manage Plugins page. To become part of the "Network Administration Group," go back to step 3.
b. On the Manage Plugins page, go to the Disabled Plugins tab to see the list of disabled plugins.
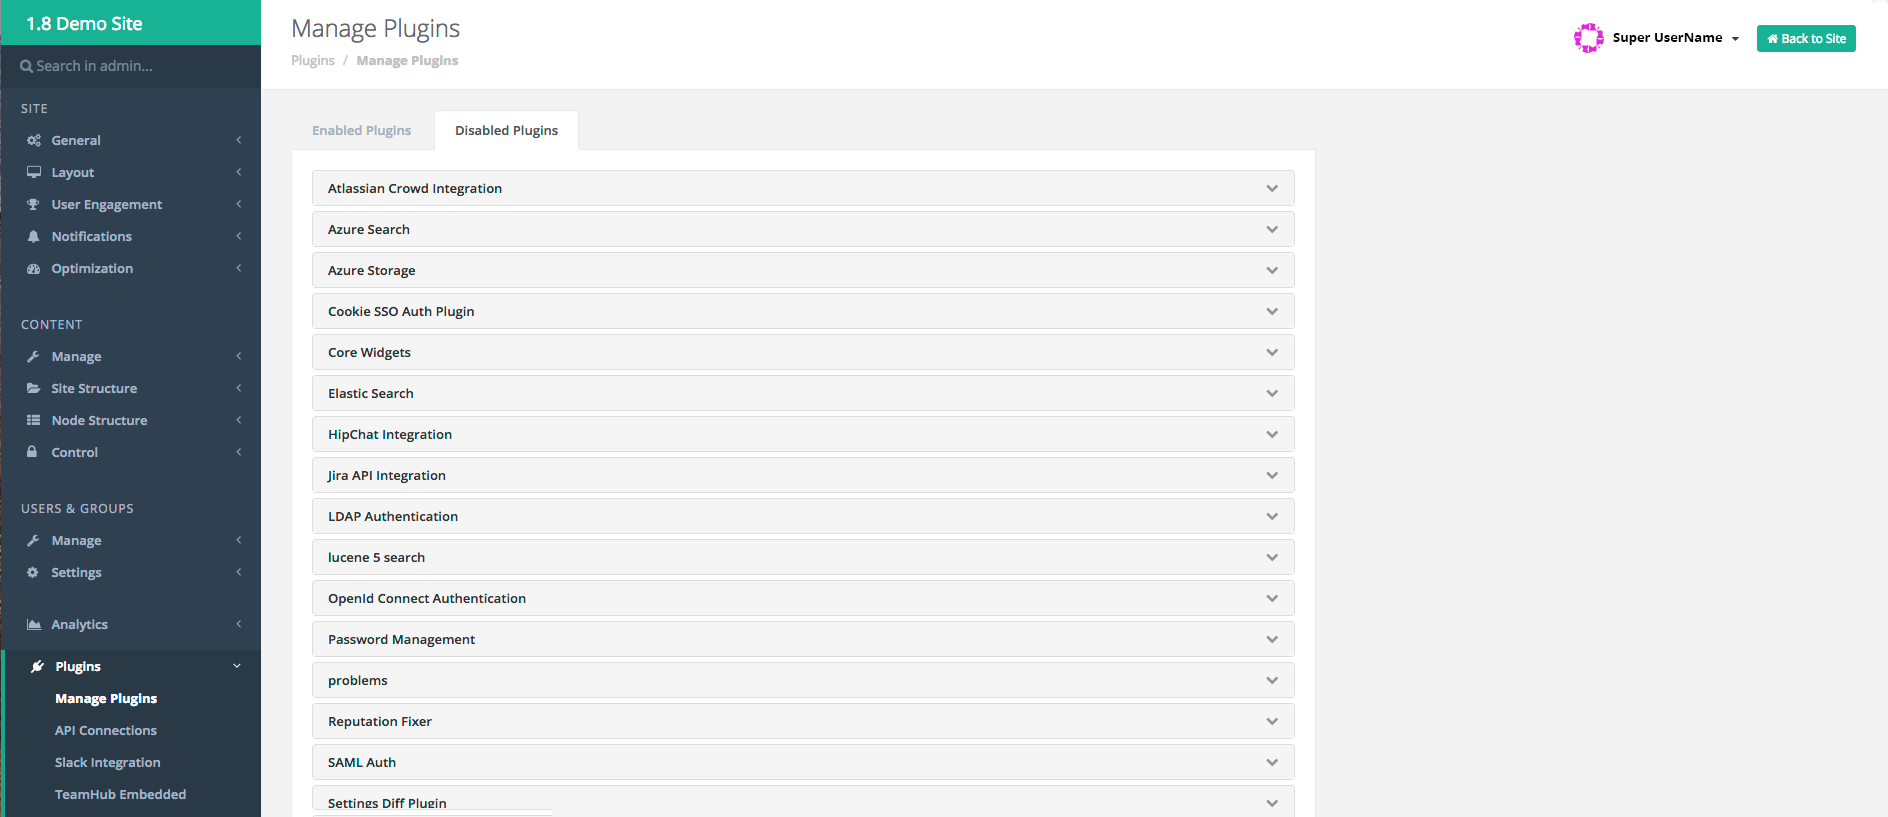
Disabled plugins page.
5. Find "Jira API Integration Plugin" and Enable
Find the "Jira API Integration Plugin" in the list and select it, then press Enable.
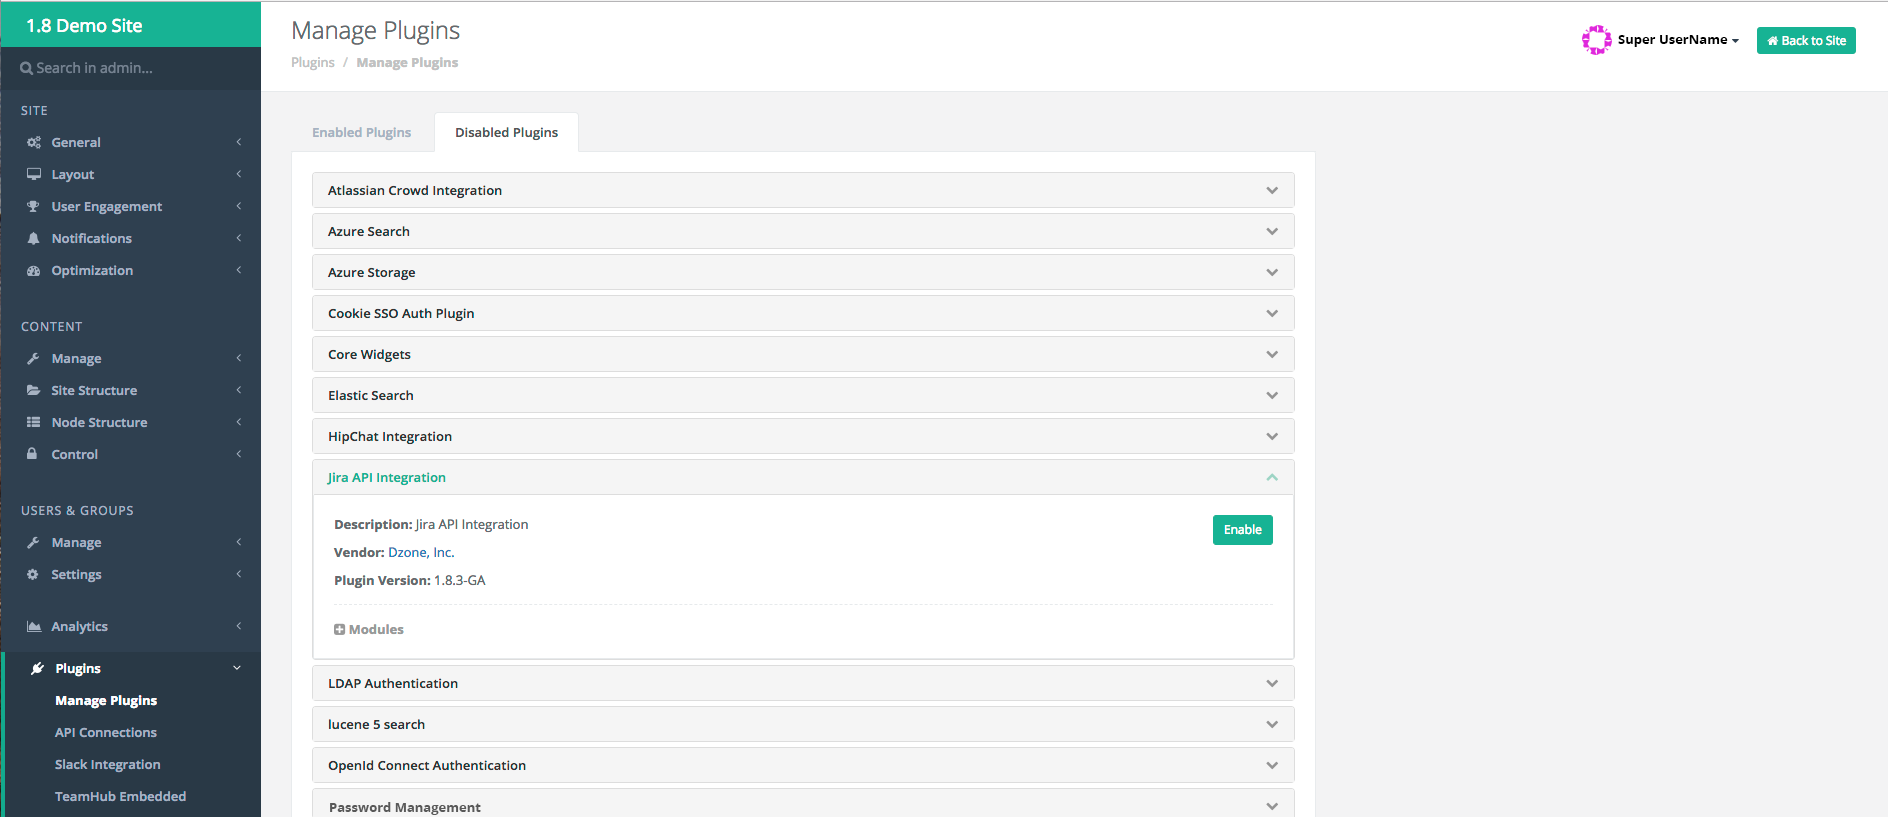
Opening a disabled plugin drop-down to see the ENABLE button.
6. Successful "Jira API Integration Plugin" Enabled
Once you enable the “Jira API Integration Plugin” you should see it in the Enabled Plugins tab.
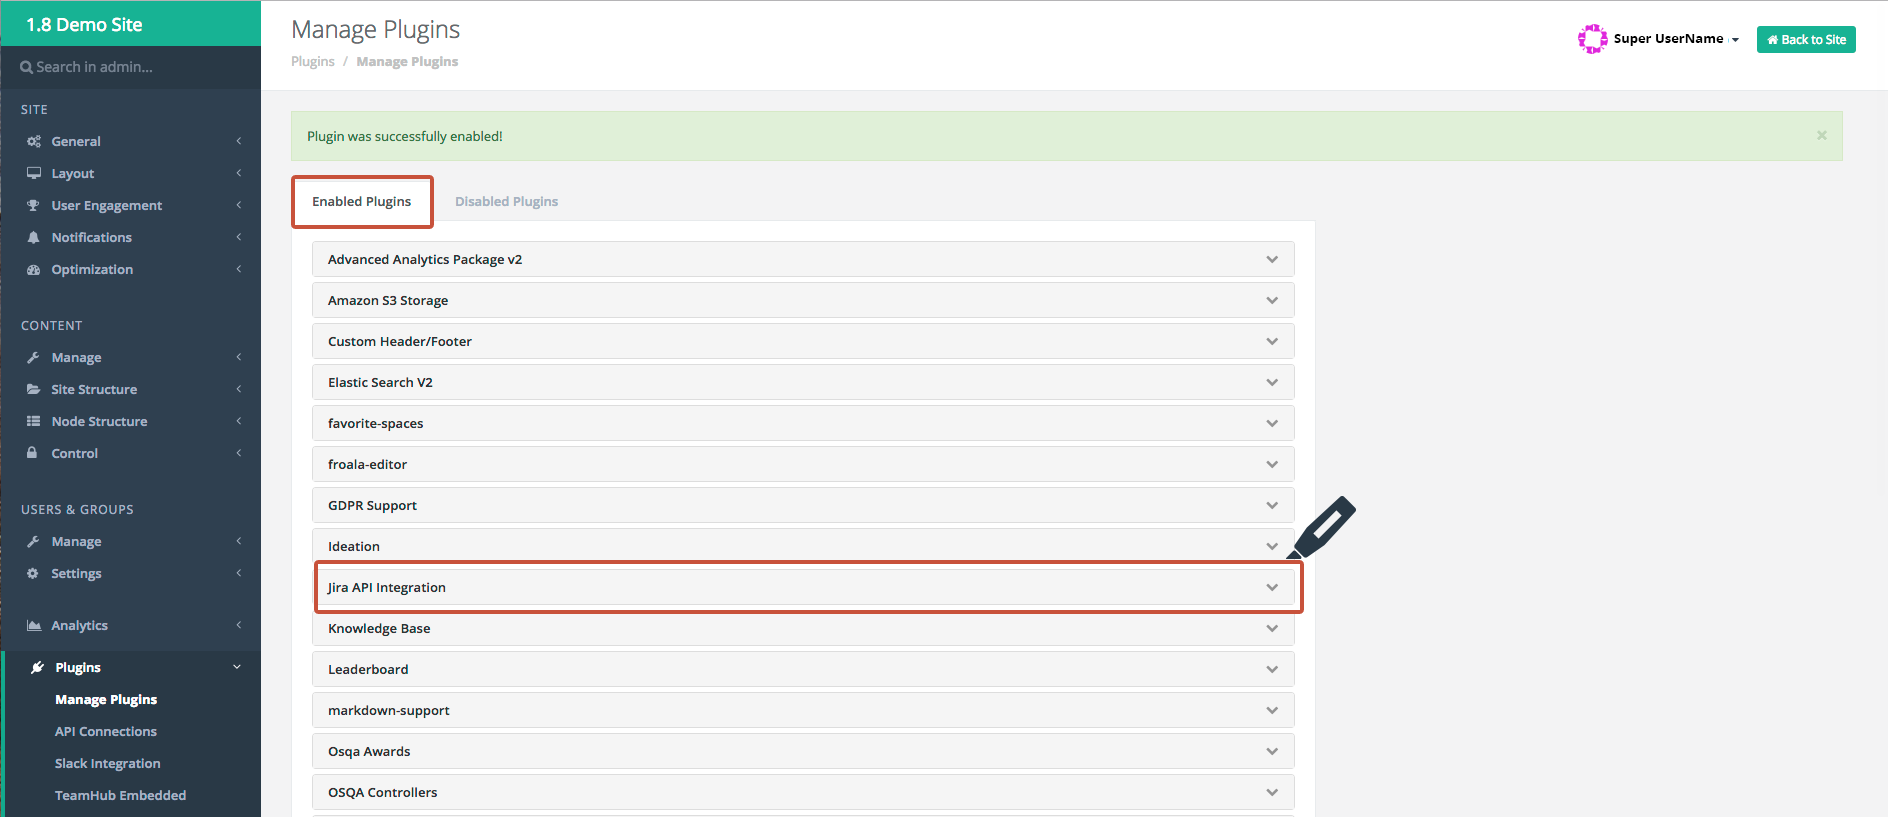
The plugin you selected to enable from the disabled plugins page should now show up in the Enabled Plugins tab.
7. Refresh Themes
a. Once you have enabled the plugin, navigate to Site > Layout > Manage Themes.
b. On the Manage Themes page, press the Refresh Themes in the “Current Theme” box on the left-hand side.
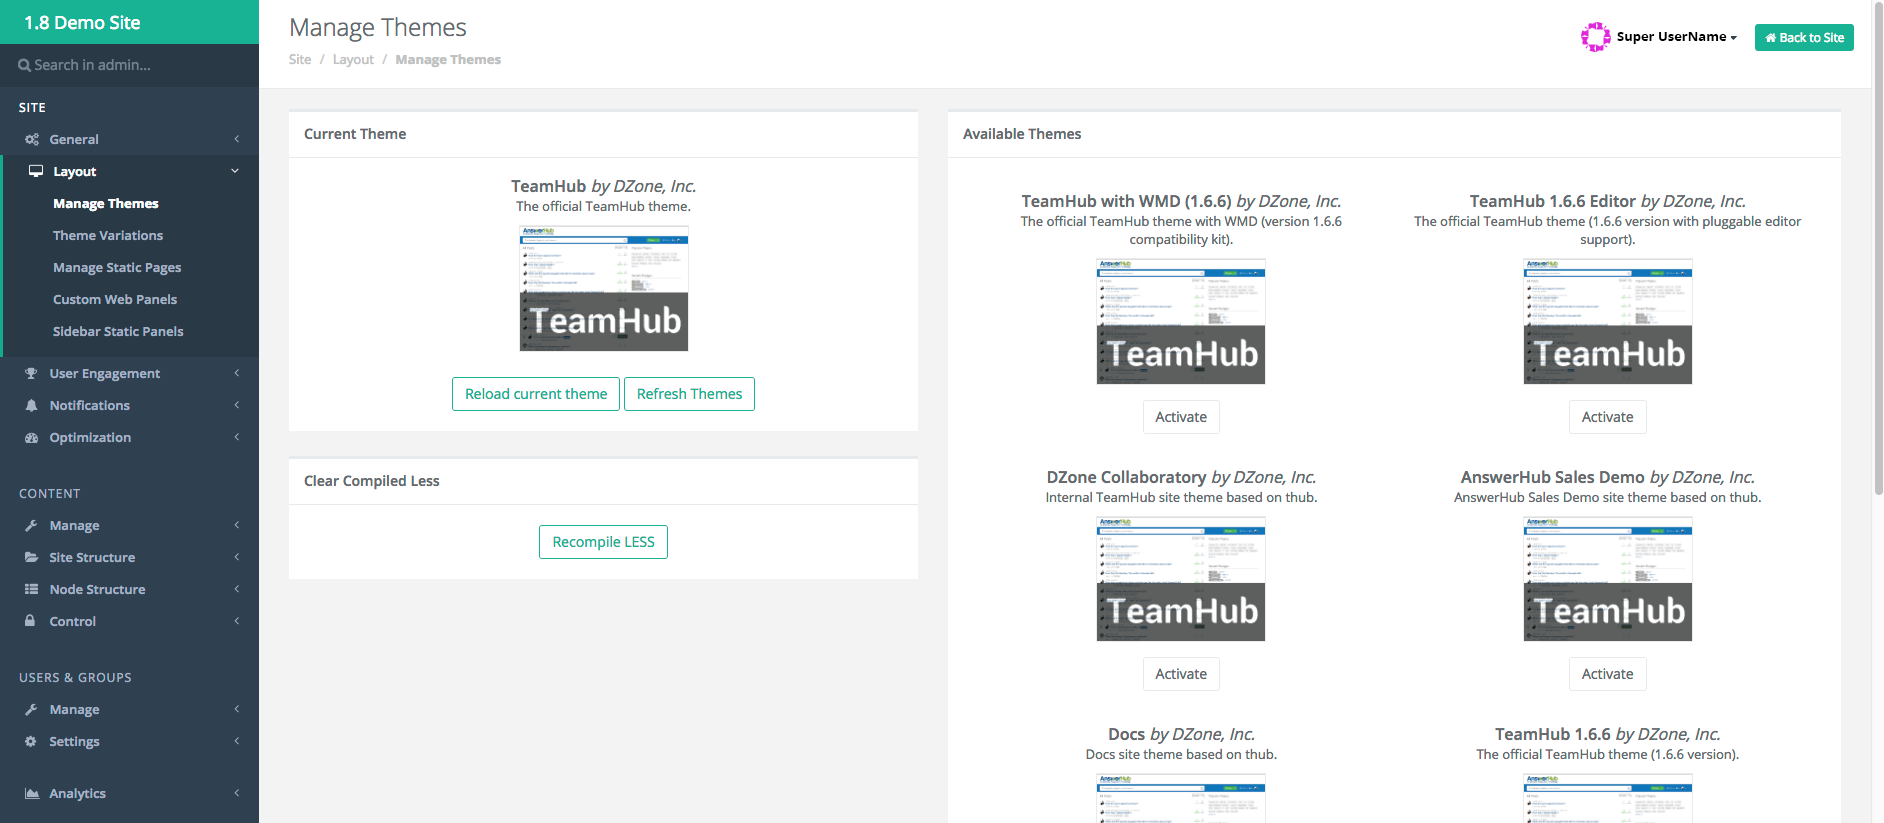
Manage Themes page.
8. JIRA API Integration link available now
You should now see the JIRA API Integration link under the Site > General menu.
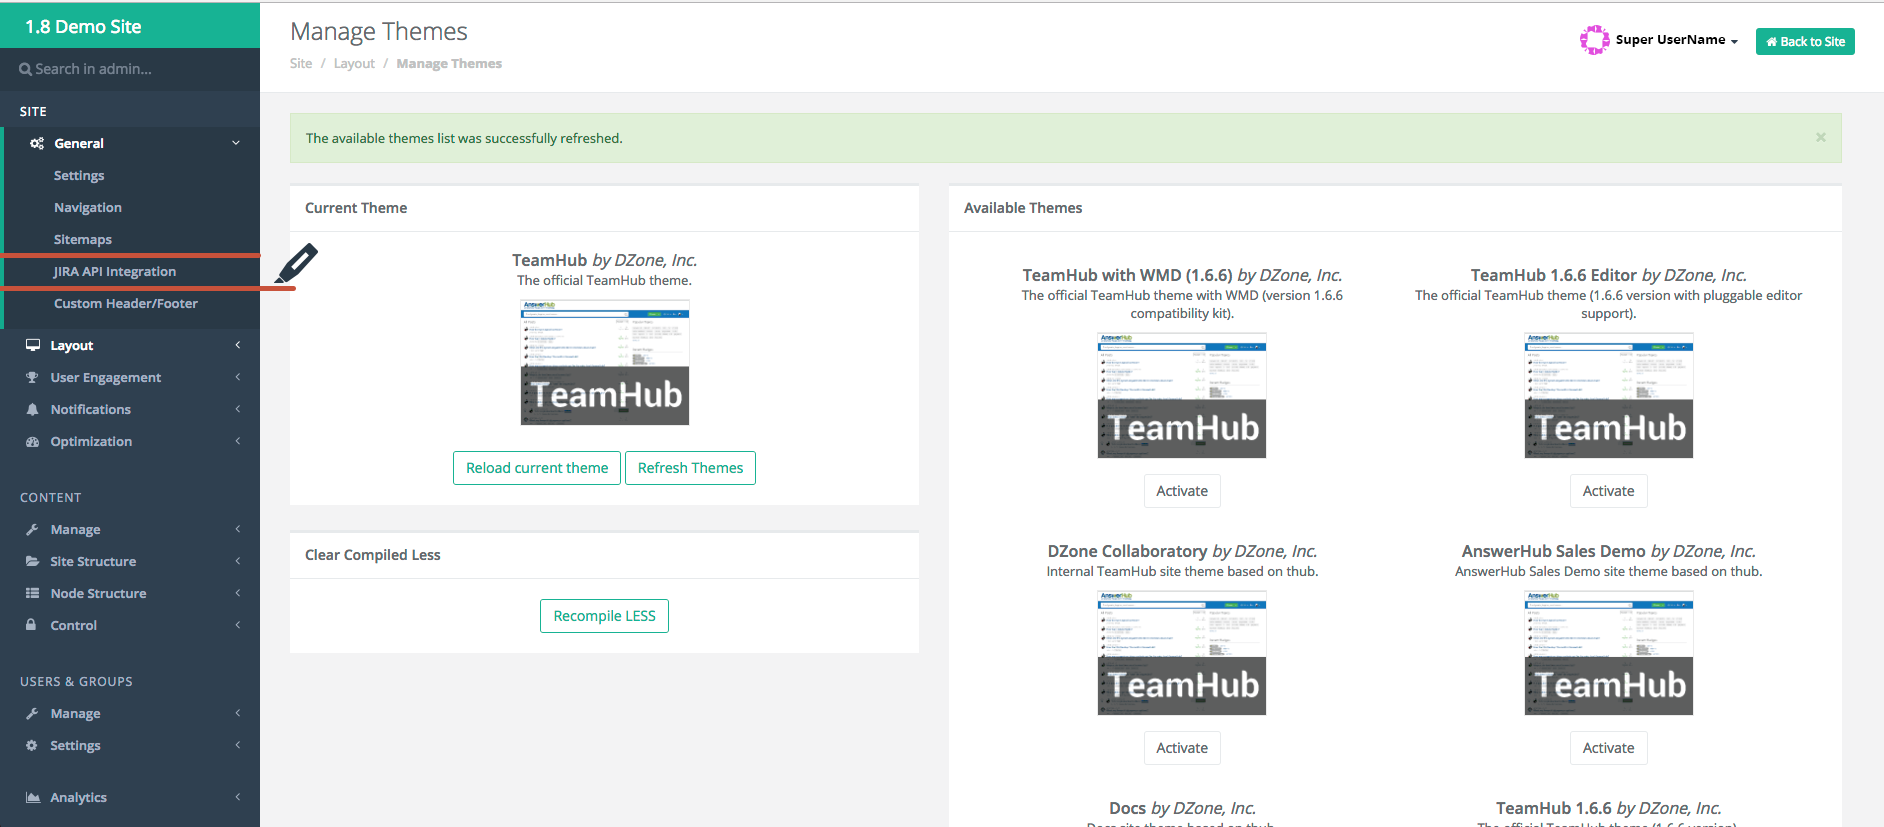
Screenshot displaying the new JIRA API Integration menu under the Site > General menu.
9. Provide Admin User Credentials in JIRA API Integration Form
a. Navigate to Site > General > JIRA API Integration.
b. Fill in the JIRA Host URL field with your host URL and provide your JIRA username and password.
NOTE ON USERNAME AND PASSWORD:
- The Username and Password added to the admin panel for the JIRA integration must be JIRA site admin credentials.
- The Username and Password credentials that get added to the admin configuration page, is the user that DISPLAYS as the "reporter" in the JIRA ticket, for all submitted JIRA tickets from AnswerHub. On this first iteration of the plugin, we suggest using a system/general user instead of a specific user.
c. The Project Key and Issue Type fields autofill, based on the JIRA host with all existing project keys and issue types.
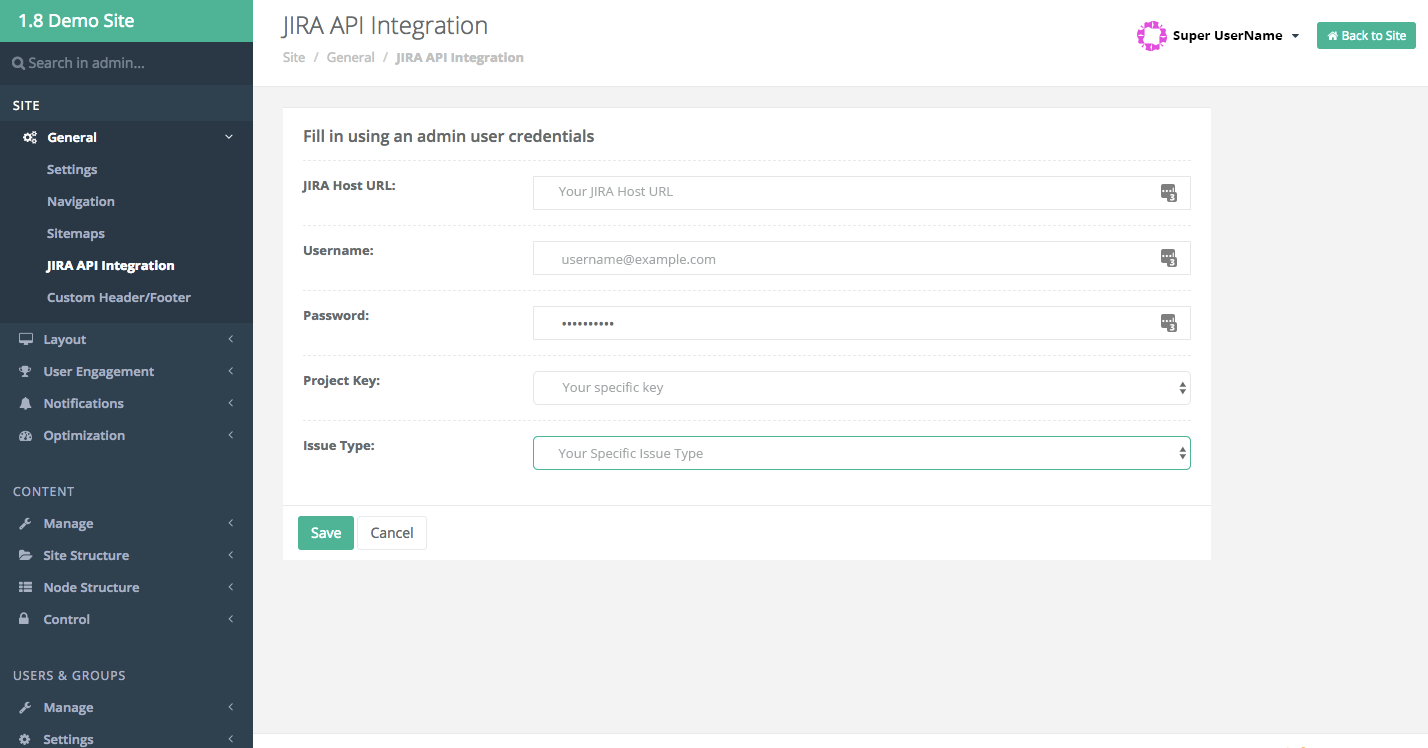
JIRA API Integration form.
NOTE:Some project keys and issue types that auto-populate will result in an error message stating, "Your ticket was unable to be submitted, please try again or contact an administrator."
You will need to select a different project key and/or issue type for the ticket to send through. We cannot provide a list of project keys and issue types that won't work due to it depending on the JIRA Host URL provided.
10. Create the Custom Role (Only for versions prior to 2.x.x)
For AnswerHub Version 2.x and later, the Jira control role already exists, so skip ahead to step 11.
To show Submit to Jira option on the menu gear icon for any question body page, you need to provide a custom role in your admin dashboard.
a. 1.6.5, 1.6.6: Navigate to Admin Dashboard > Users & Groups > Custom Roles, then add the custom role.
- Must add "ROLE_SUBMIT_JIRA_TICKET" for the Name field and "Submit Jira Ticket" for the Label field. (only required for the first time making the custom role).
b. 1.8.x / 1.9 versions : Navigate to Admin Dashboard > Users & Groups > Manage > Custom Roles, then add the custom role if the role is not already found in the custom roles section. - Must add "ROLE_SUBMIT_JIRA_TICKET" for the Name field and "Submit Jira Ticket" for the Label field. (only required for the first time making the custom role).
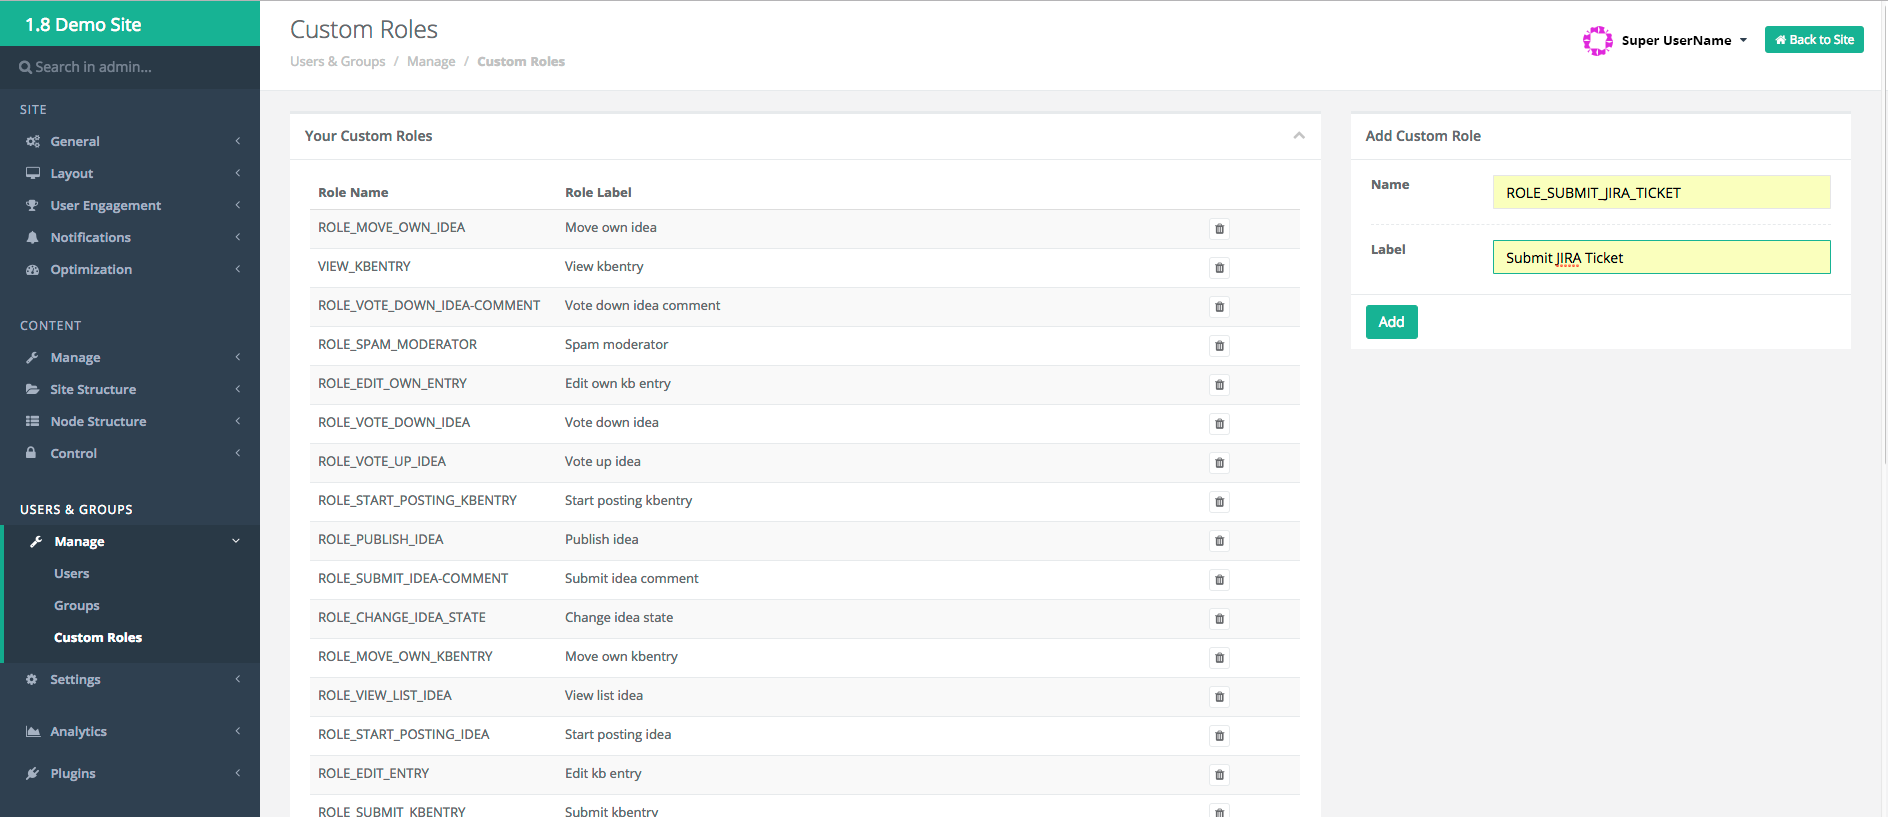
Creating your custom role under "Add Custom Role" on the right-hand side of the page.
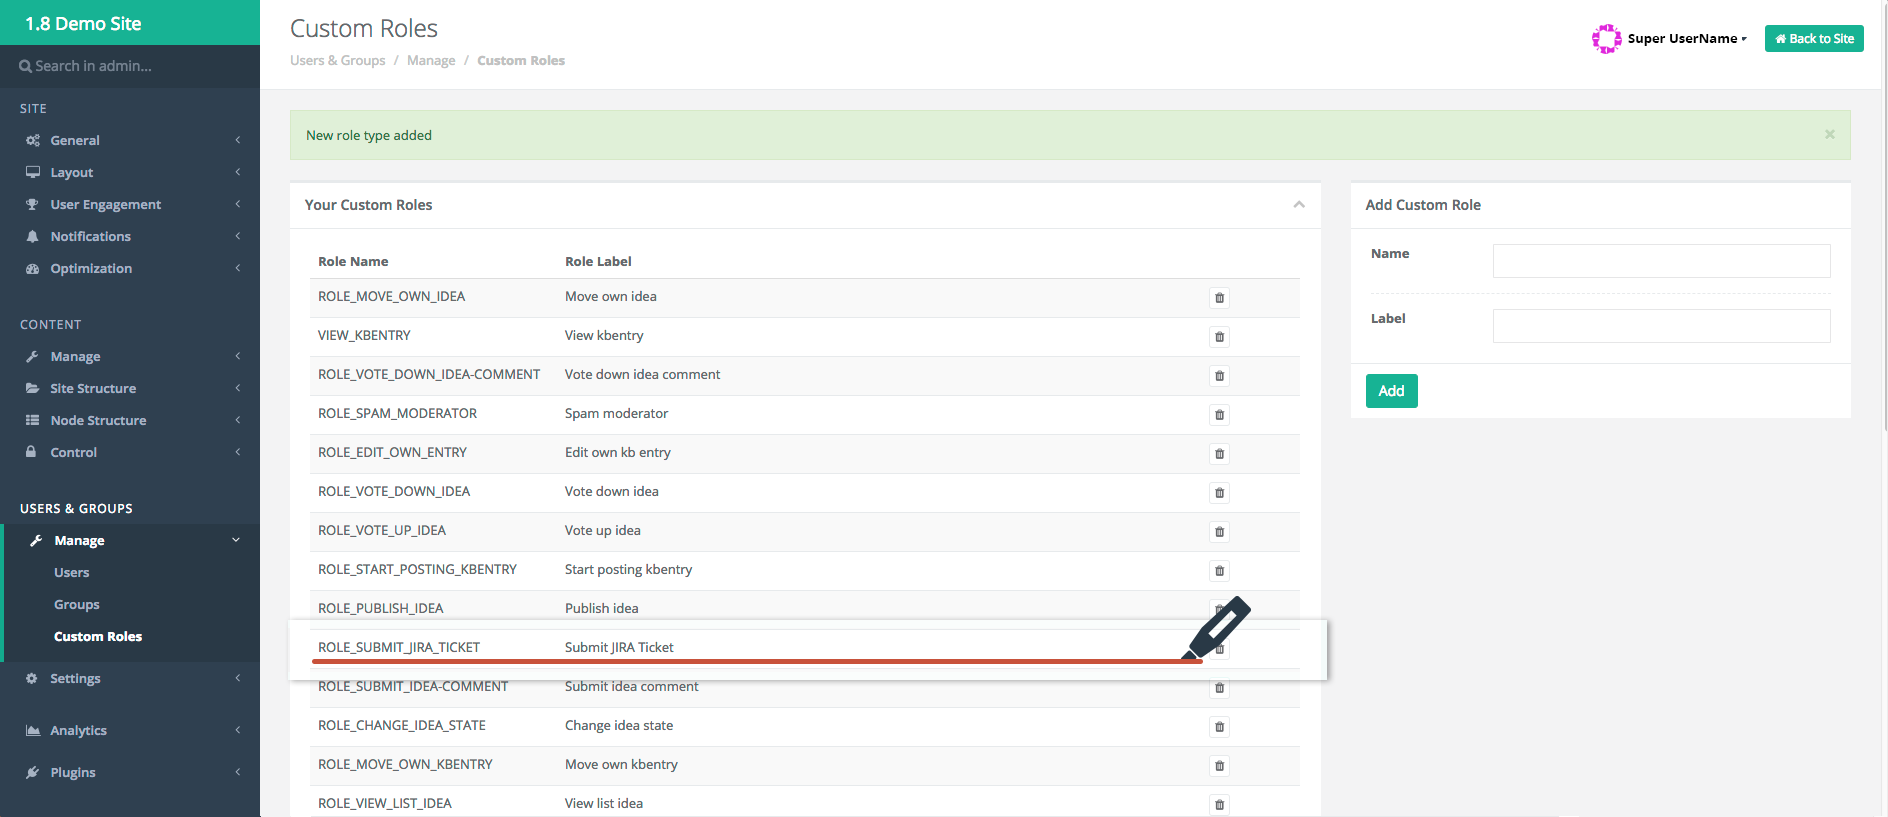
Successful creation of the custom role, "ROLE_SUBMIT_JIRA_TICKET."
11. Grant Access or Grant by Reputation for the New Custom Role
a. After creating the Custom Role, navigate to Users & Groups > Manage > Users.
b. Navigate to the specific user.
c. Navigate to the wrench and select Permissions.
d. Navigate to "Site Permissions" and click on the wrench.
e. Select Advanced and then select the Custom Roles drop-down.
f. You can either grant this custom role or set it by reputation:
- Grant Access: Select Grant from the drop-down to the Submit JIRA Ticket custom role you created earlier.
NOTE:Once you create the custom role, you don't need to create it again, you just need to grant access to it for other users who want to use the JIRA Integration.
- Grant by reputation: Select By reputation and insert a numerical value to serve as the threshold that would unlock the ability to submit JIRA tickets.
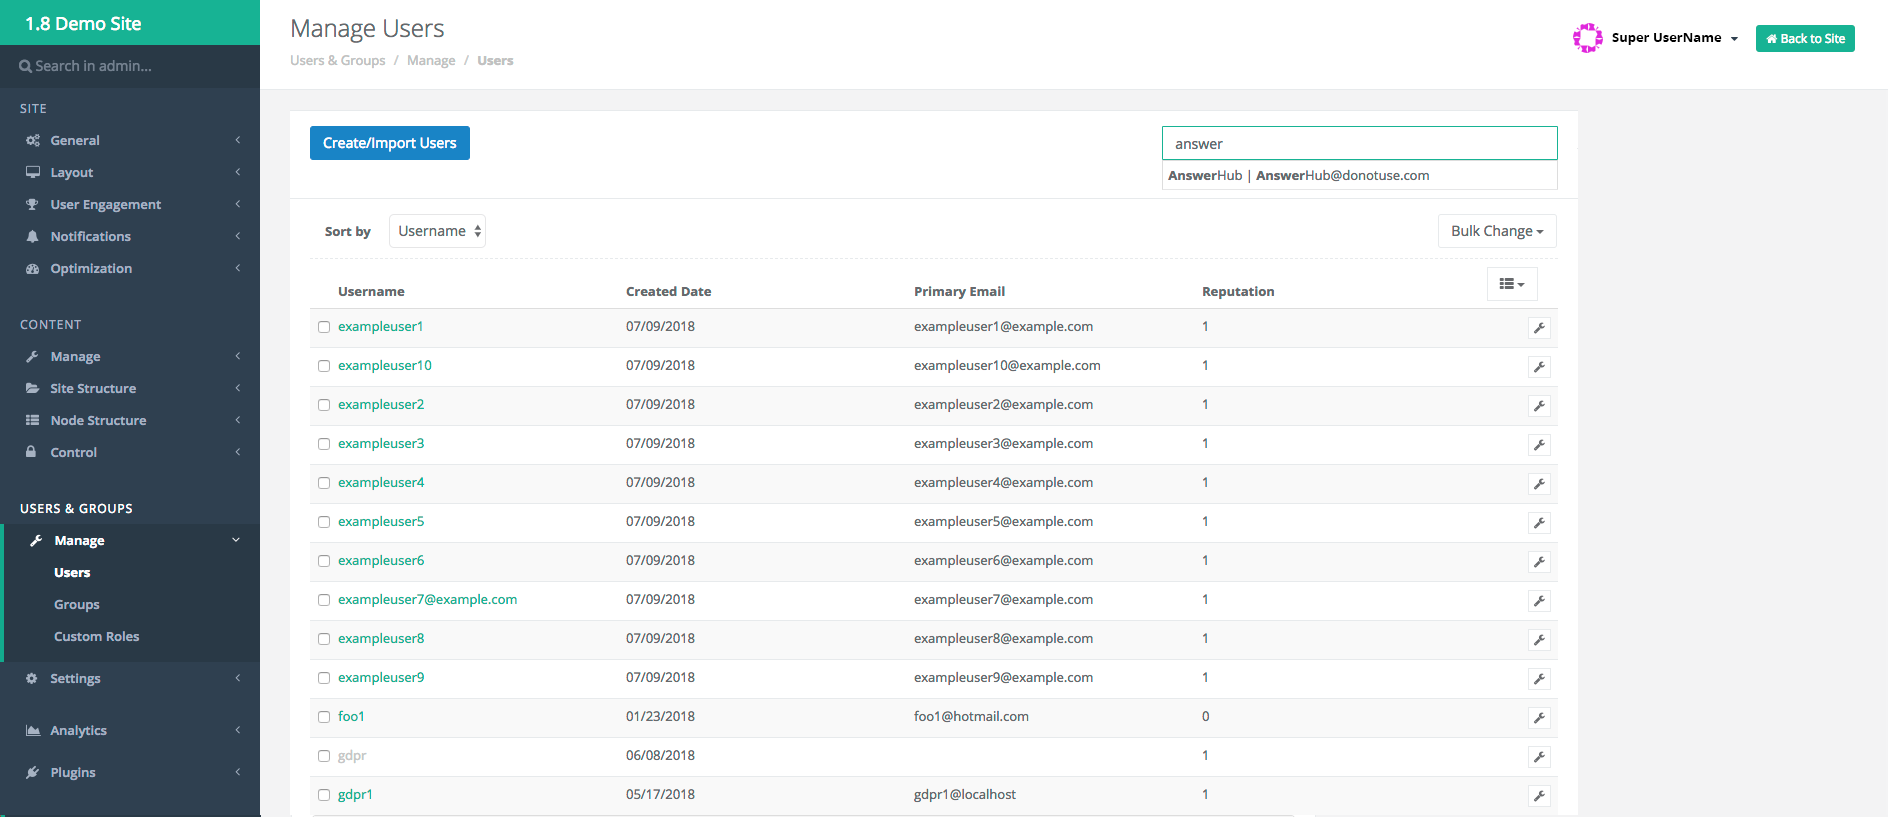
Searching for a user to grant them the custom role permission.
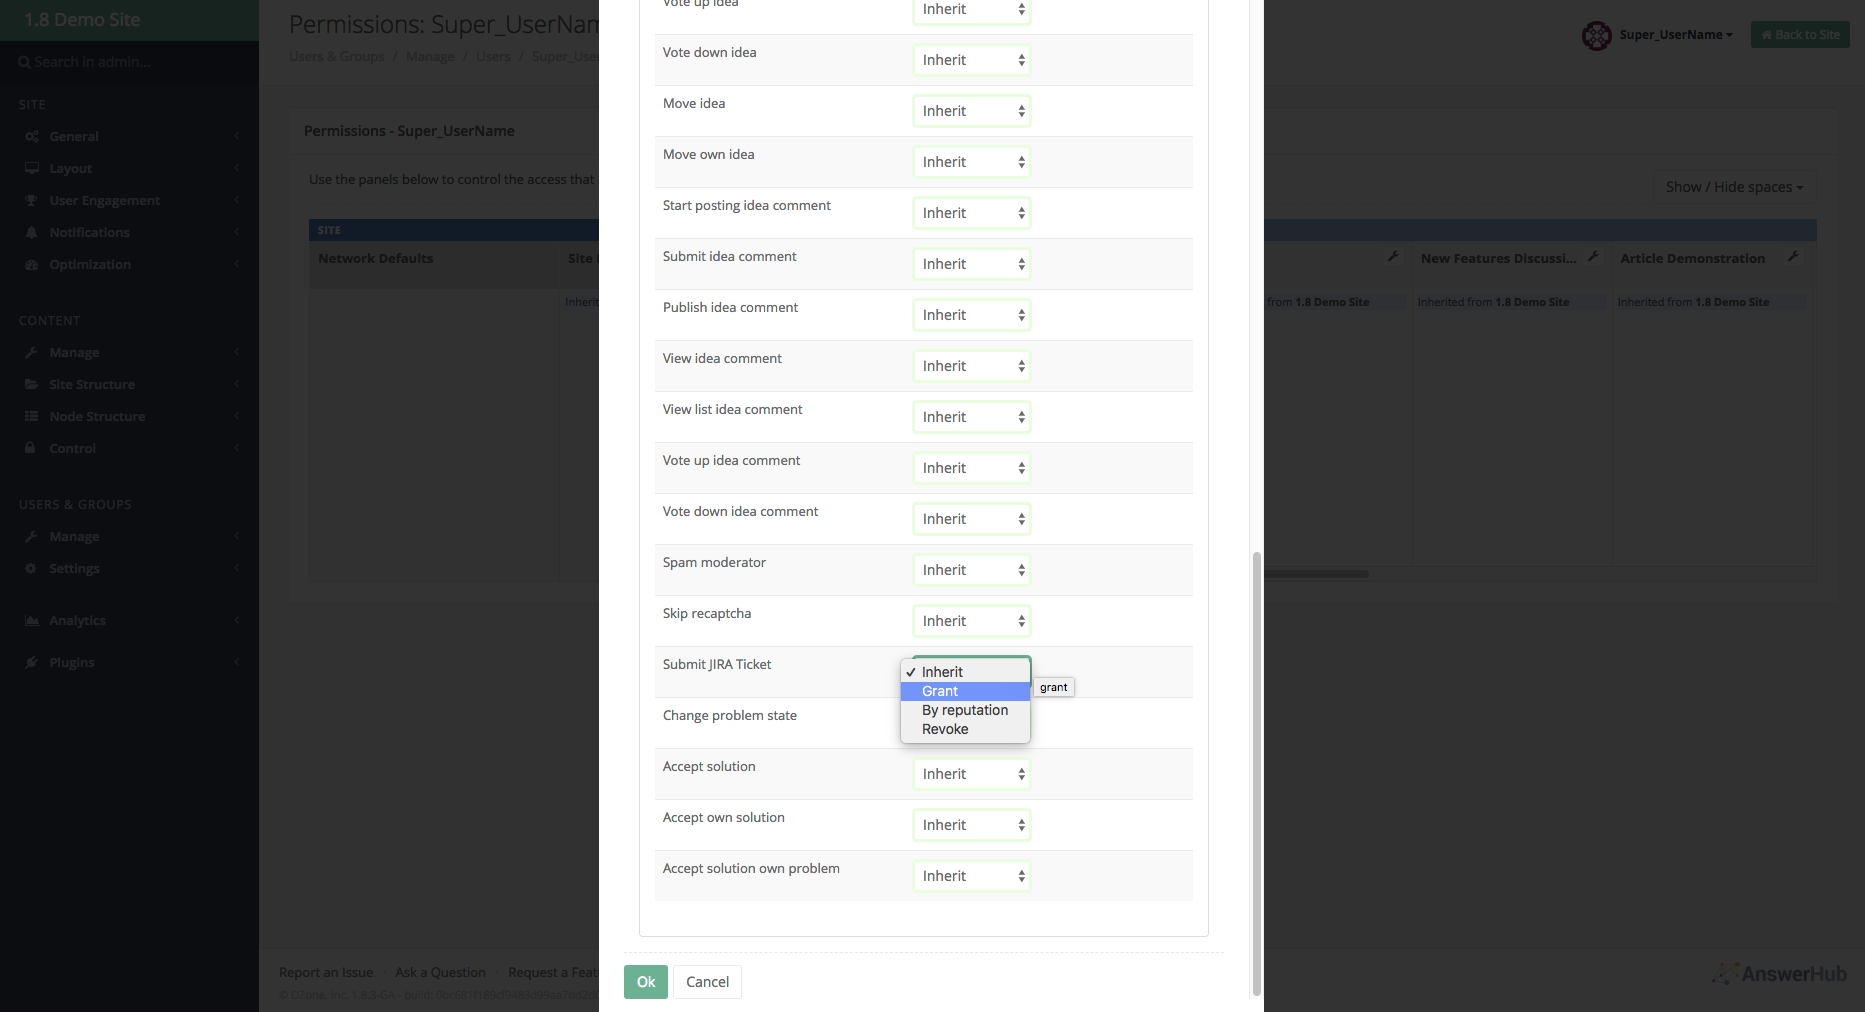
Granting the custom role permission for the user you selected.
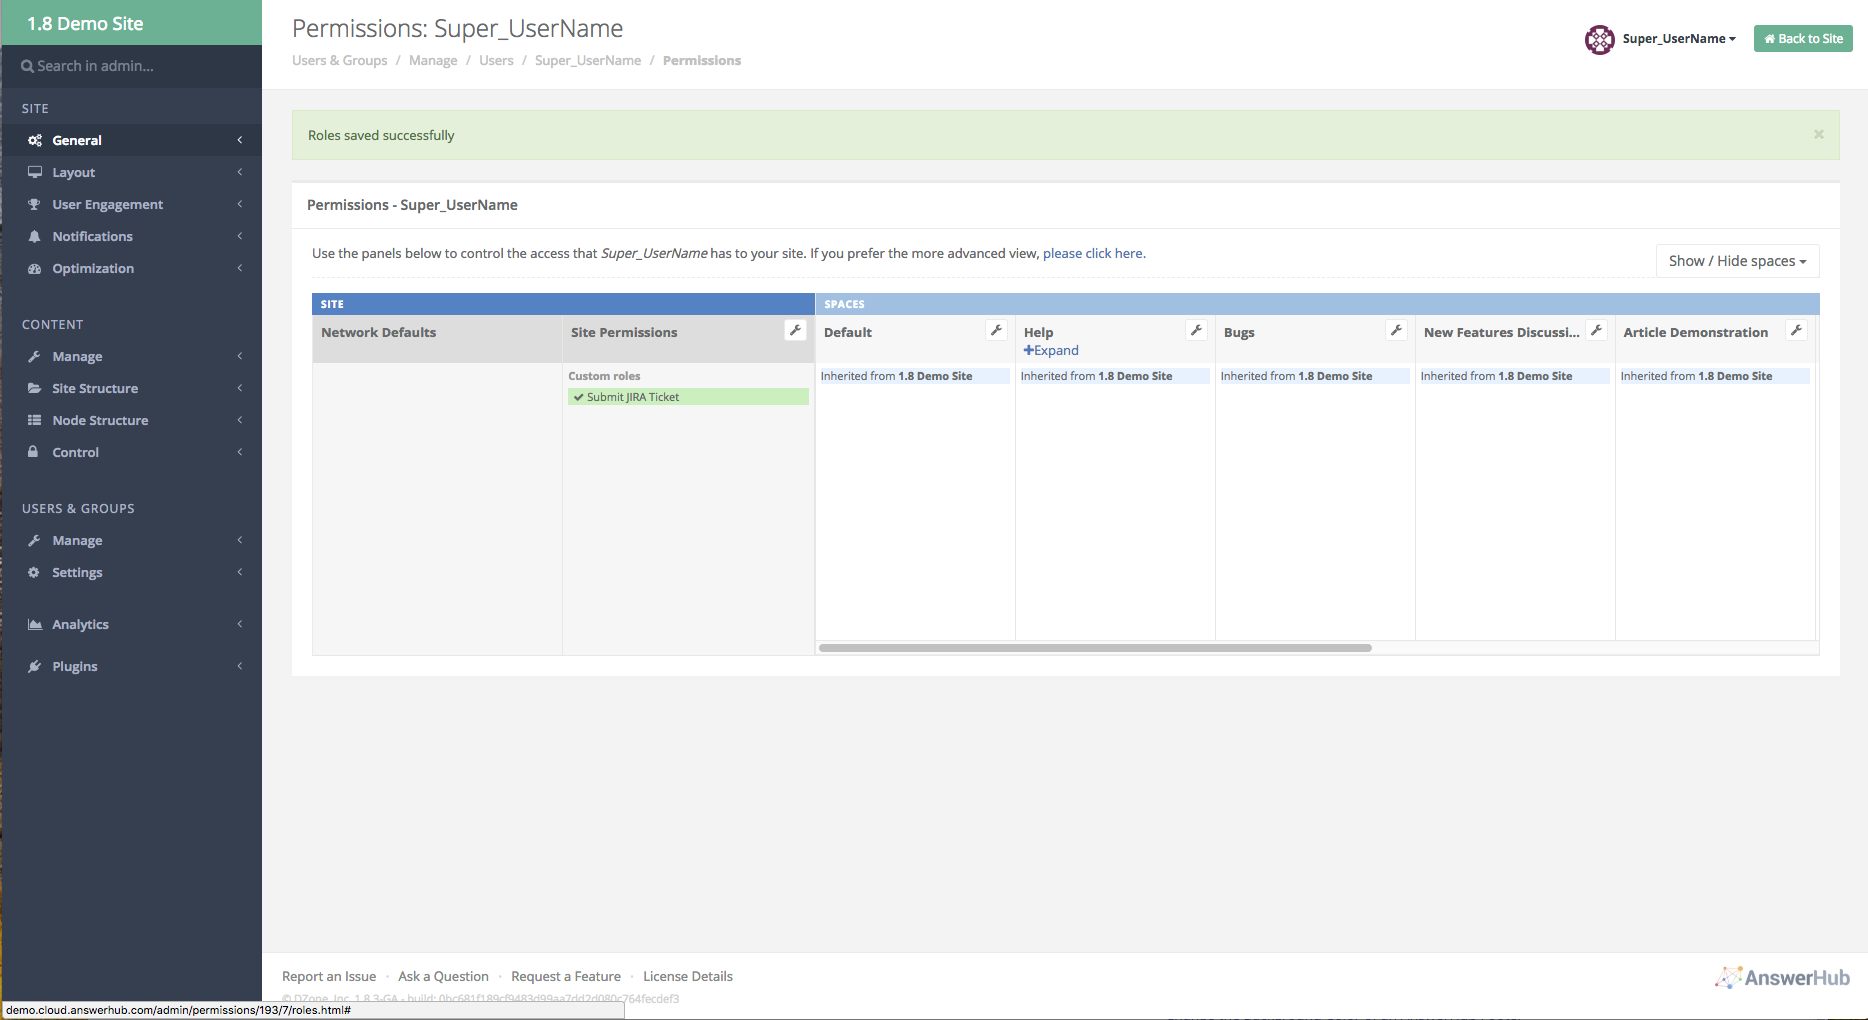
Custom role permission granted and saved successfully.
12. Receive Status Updates by Setting Up Your WebHook
To receive status updates from JIRA for your linked tickets, you will need to set up the WebHook.
For the URL, enter https://<yourServerUrlHere>/jira/webhook/notifications.
As a Community User
To use the new JIRA integration as a community user, follow the steps below.
How to Submit a JIRA Ticket from a Question
We added a new AnswerHub command, called “Send To JIRA,” for questions.
a. You can access the new option from an AnswerHub question by pressing the menu gear icon.
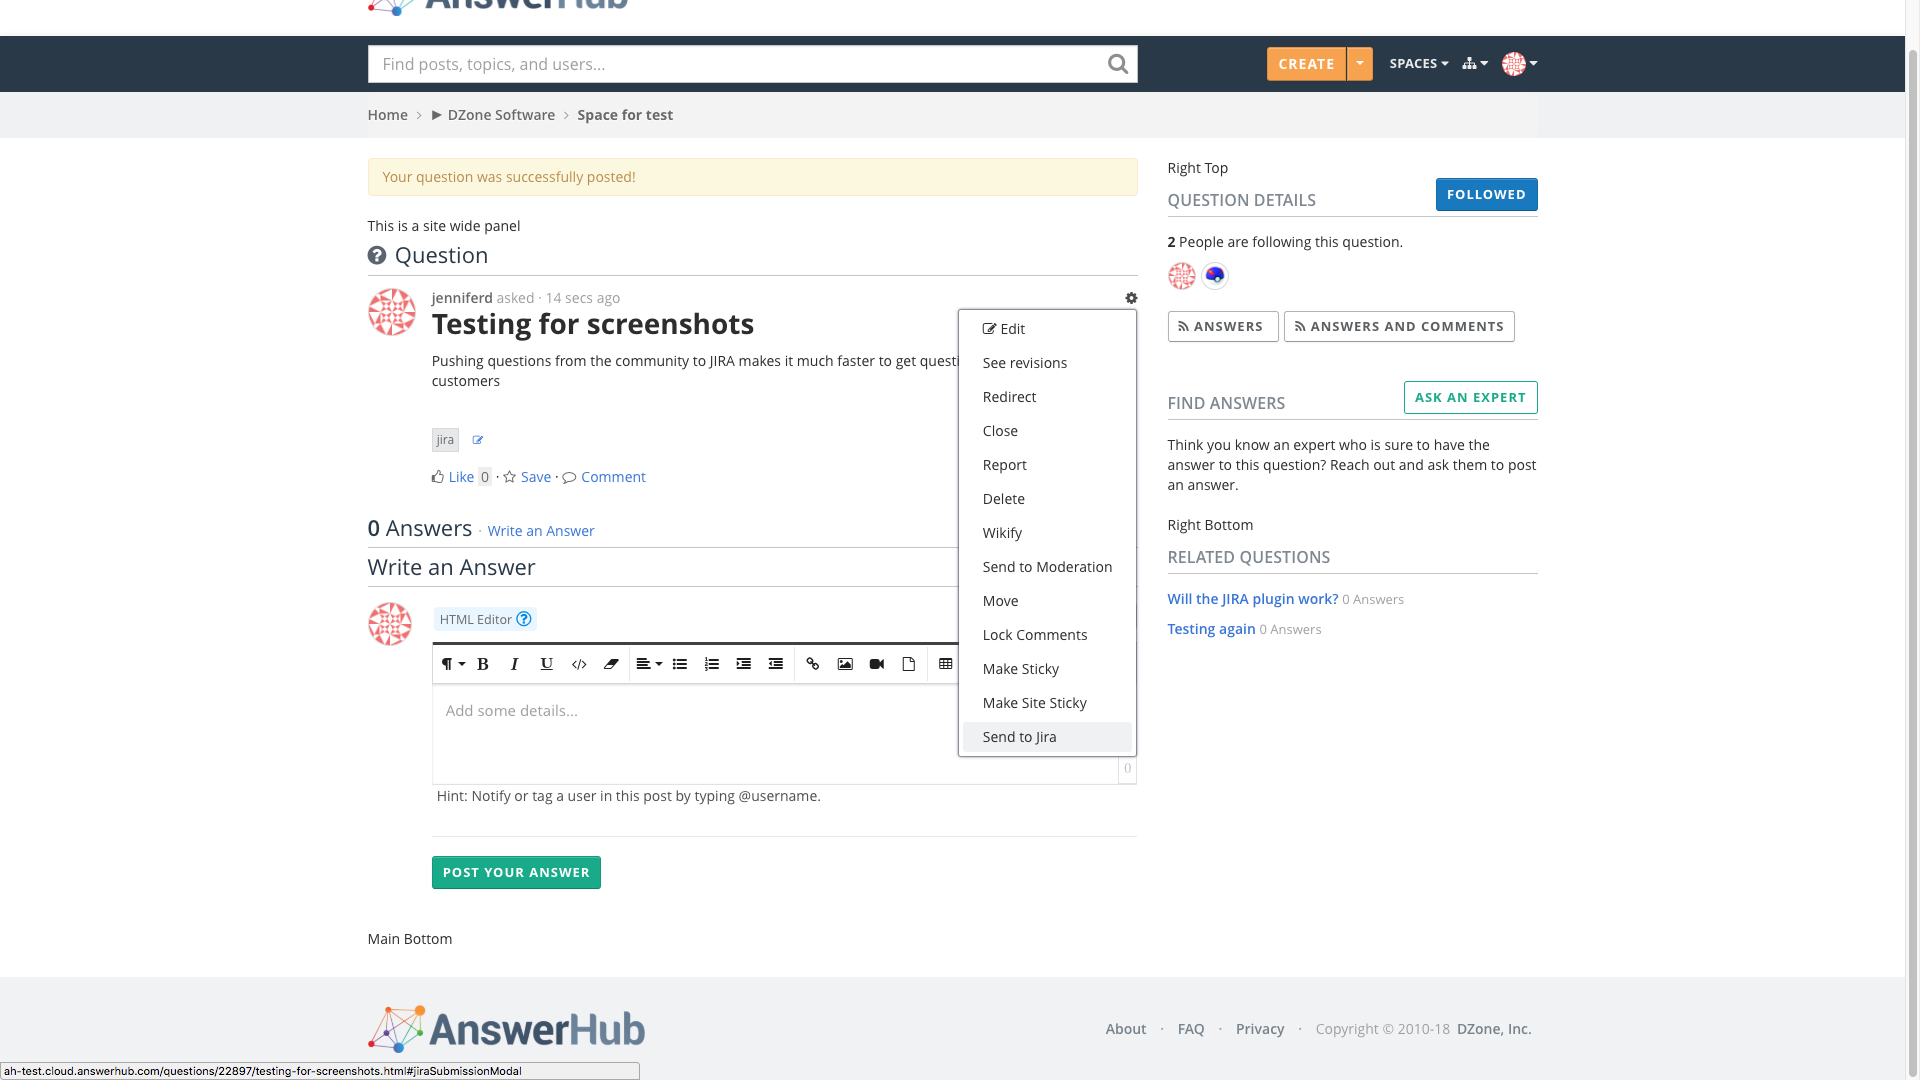
User Community Interface view of the new "Send to Jira" option.
b. A modal window with a form to fill out pops up to "Submit a ticket to JIRA."
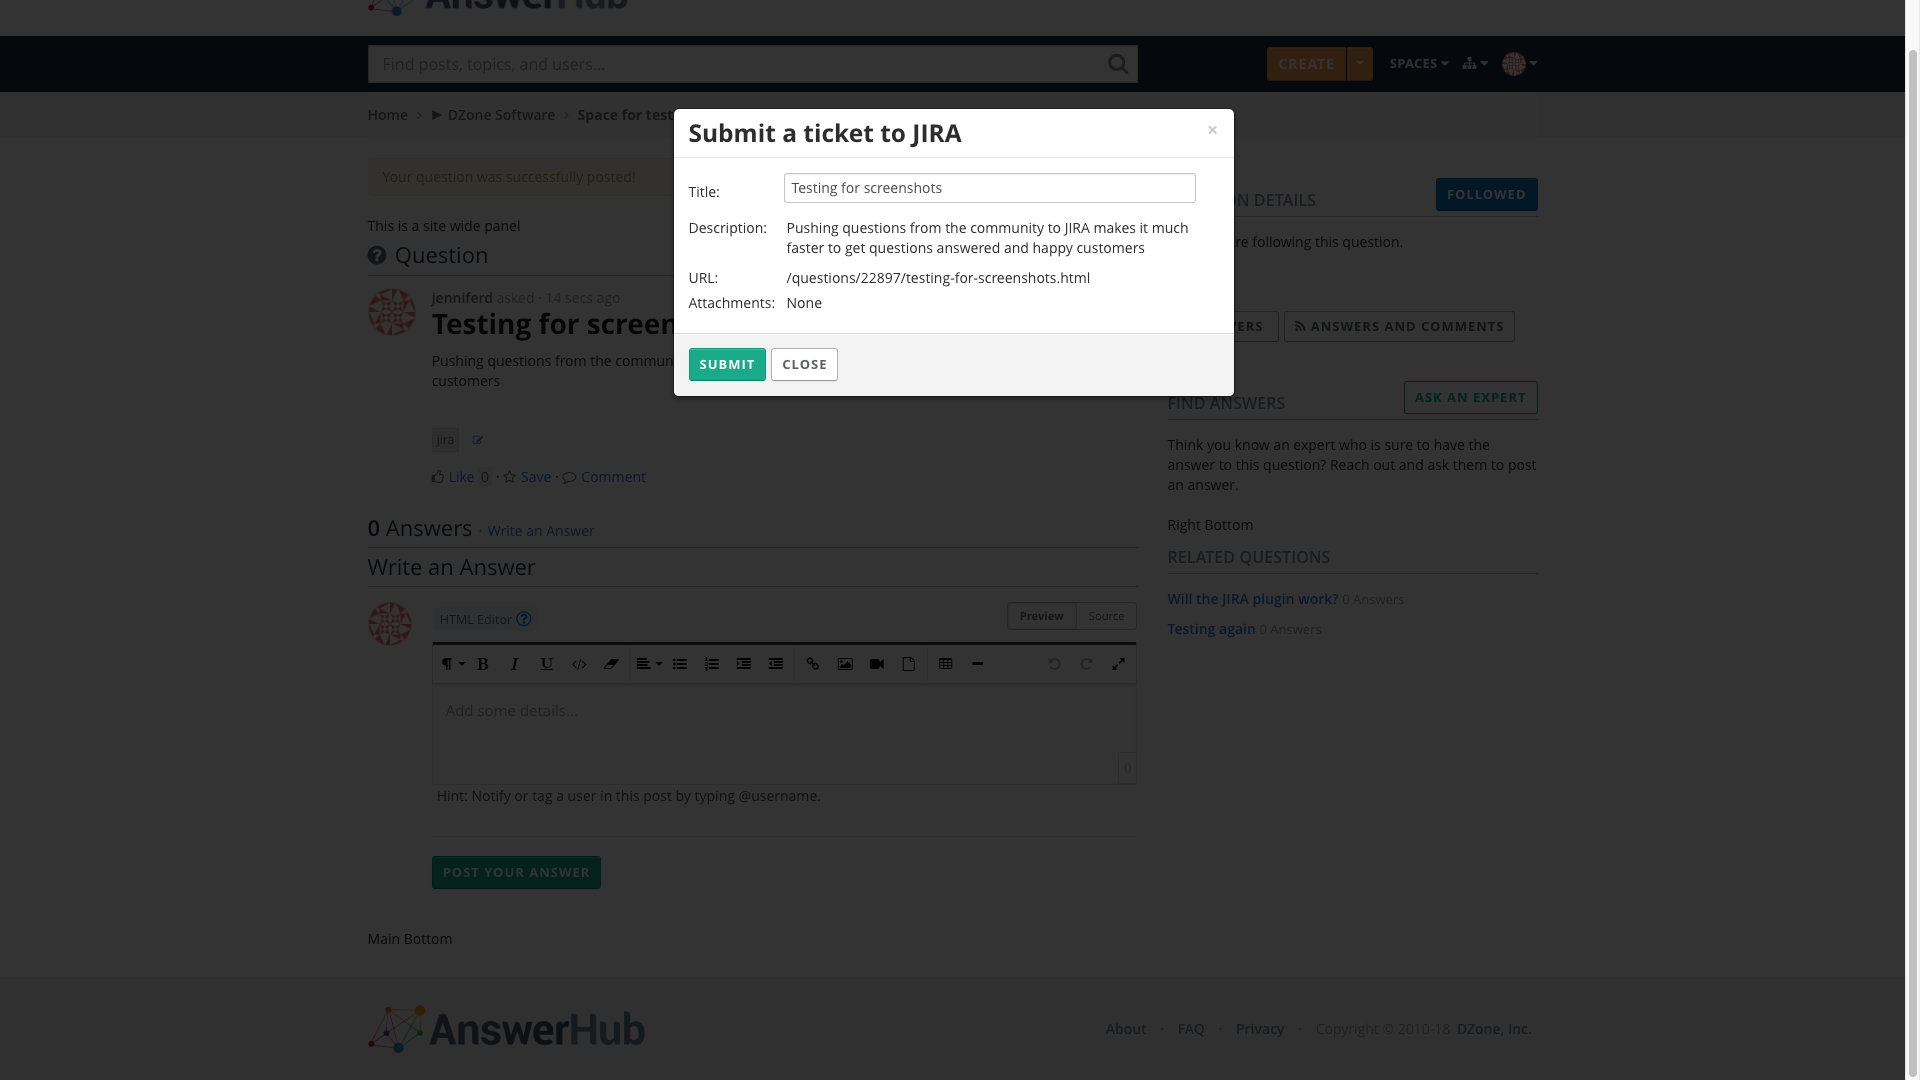
Form to fill out to submit a ticket to JIRA.
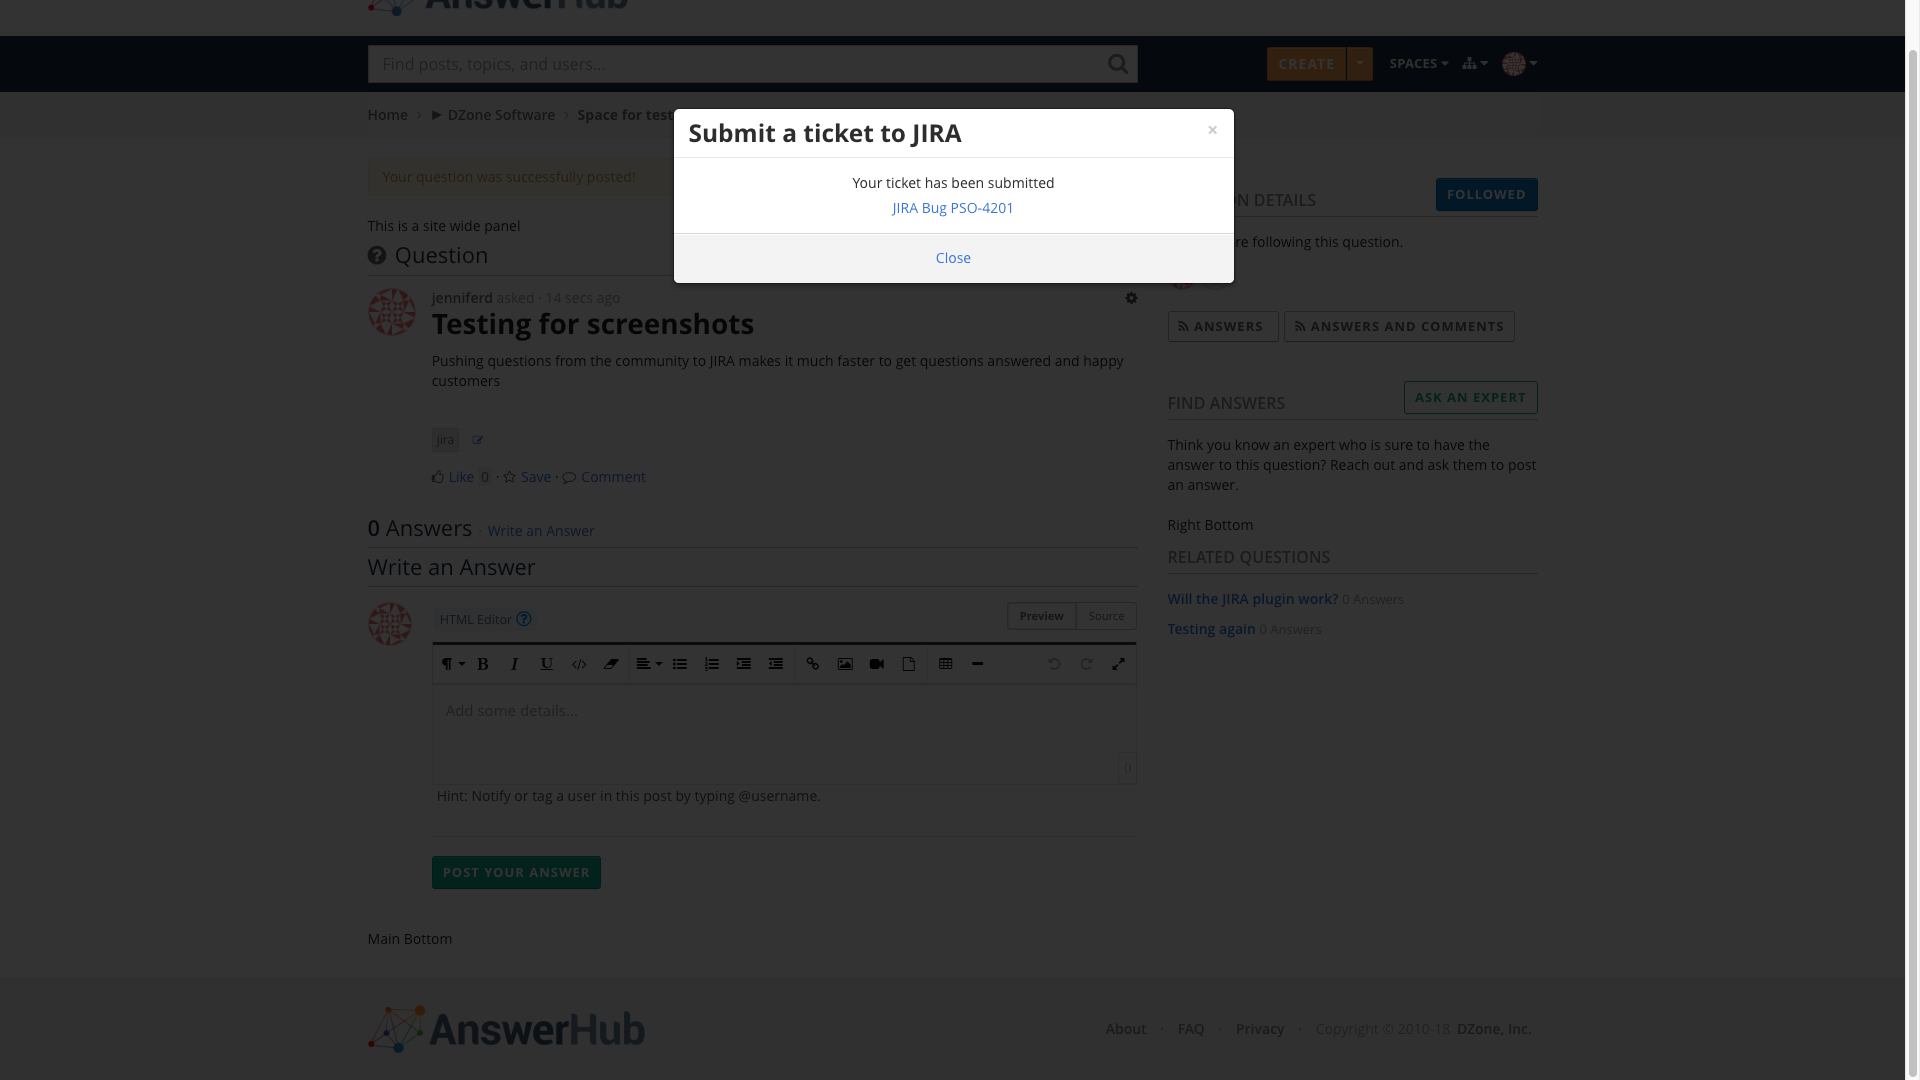
Successful submission of the form to send to JIRA and create a ticket.
c. A successful JIRA submission will result in a new link to the right of the question box.
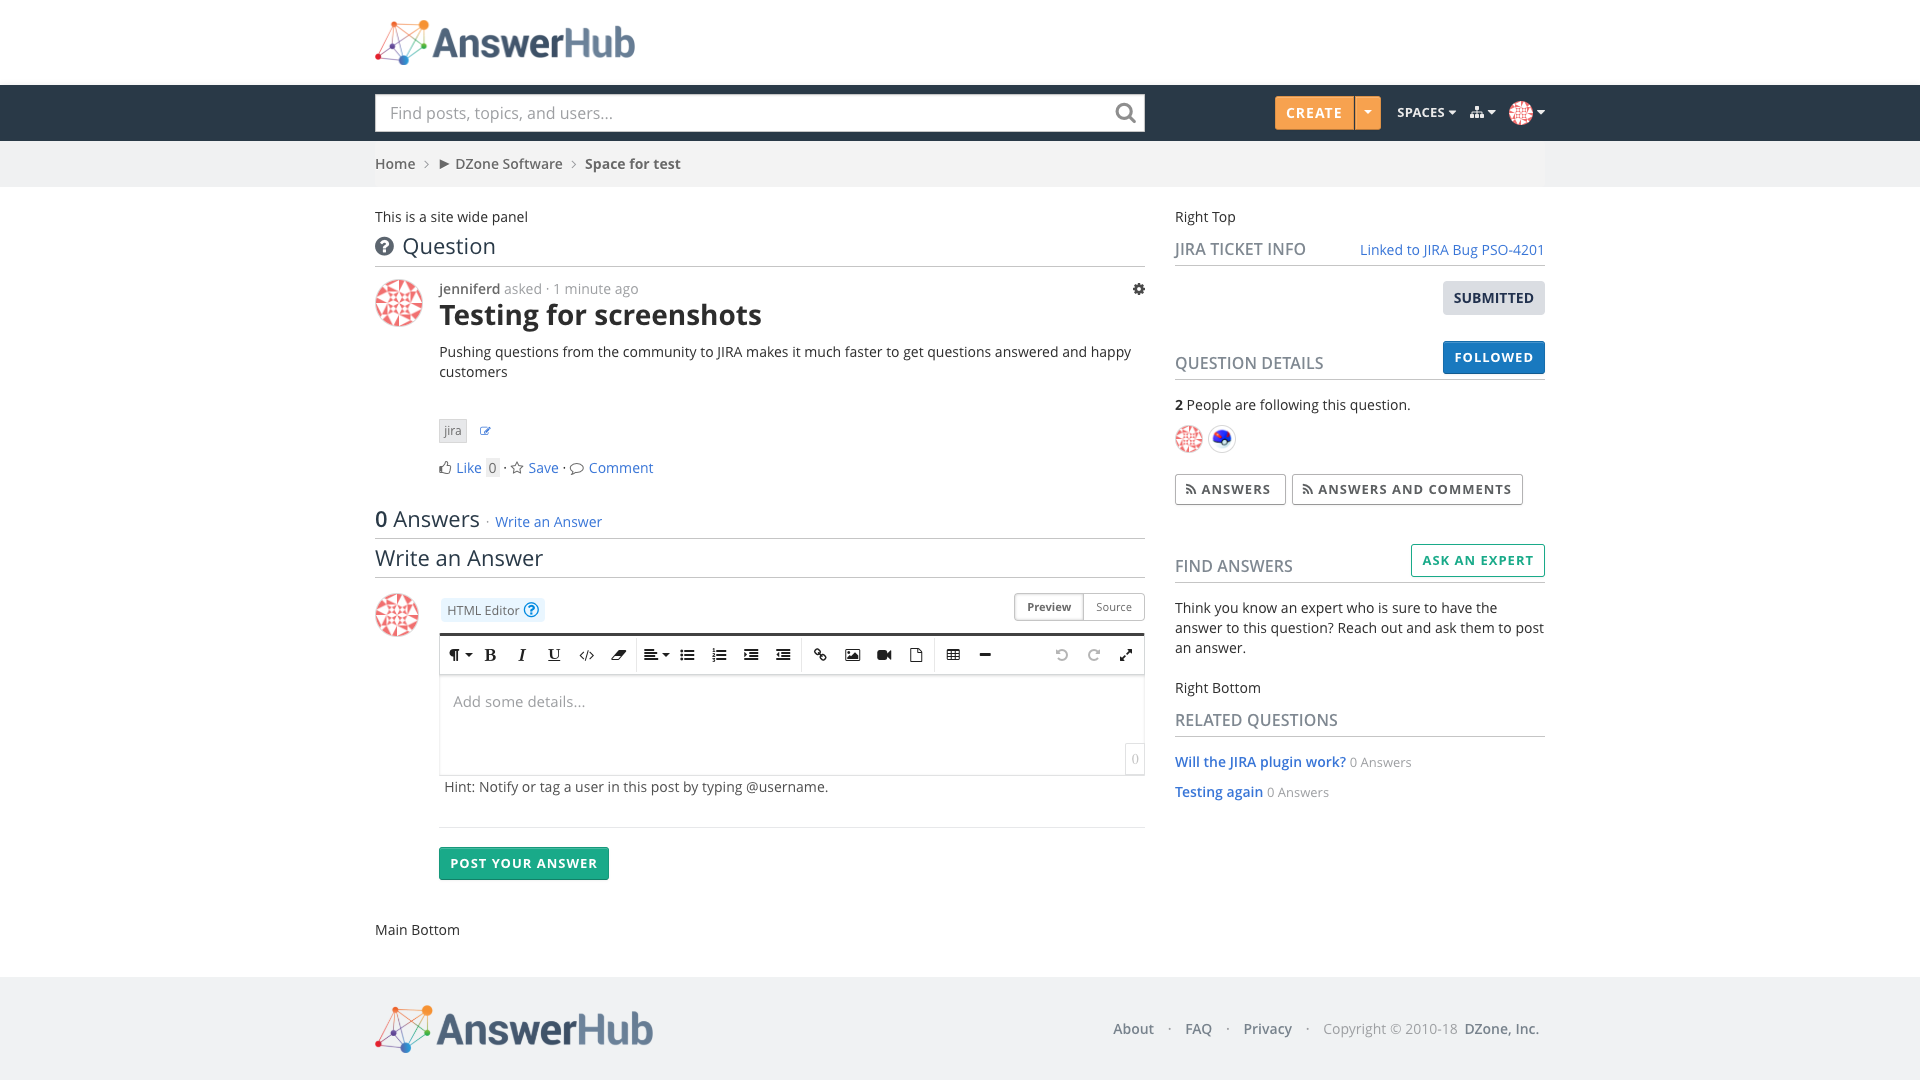
Community User Interface view of the "JIRA Ticket Information" and link to the submitted ticket. The User can see the status of the ticket, here it is "Submitted."
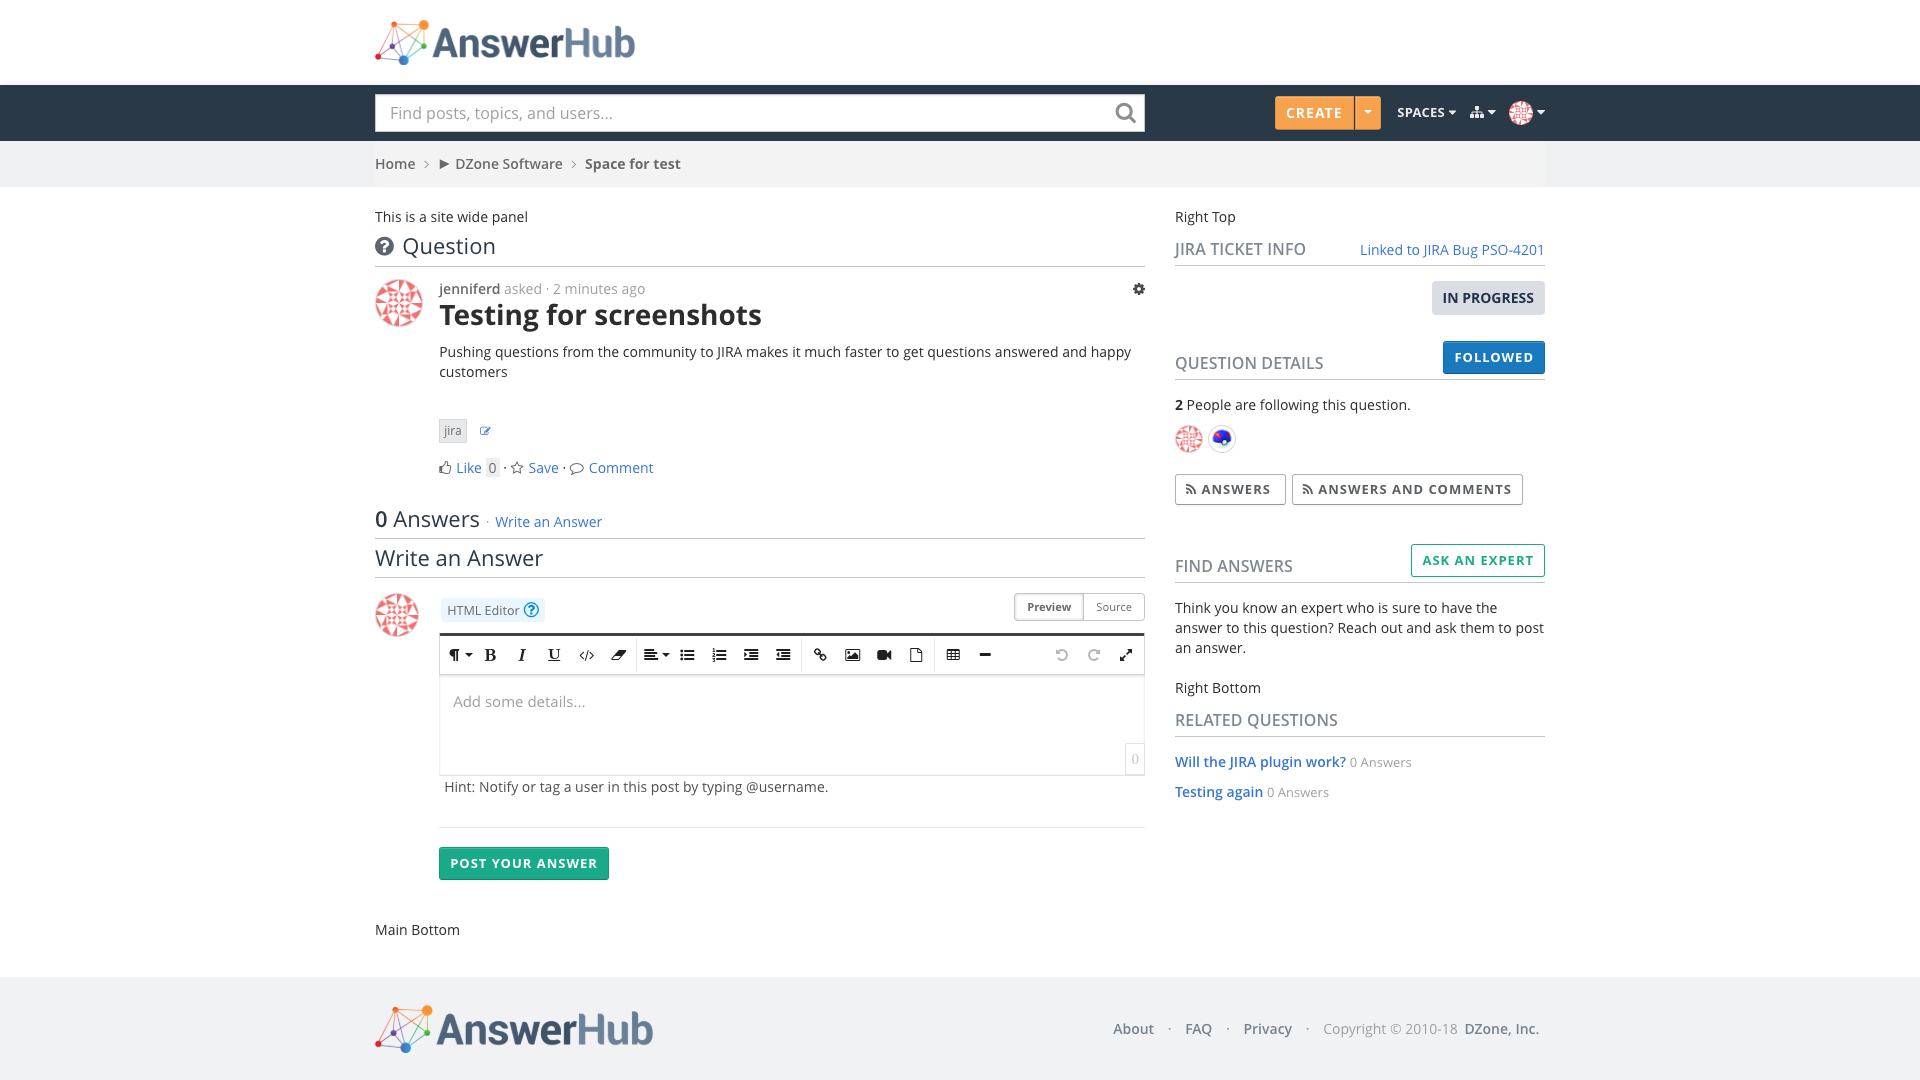
The status has updated to "In Progress" and the user can see this status change in the Community User Interface.
Updated 3 months ago
